Welcome to Daralet
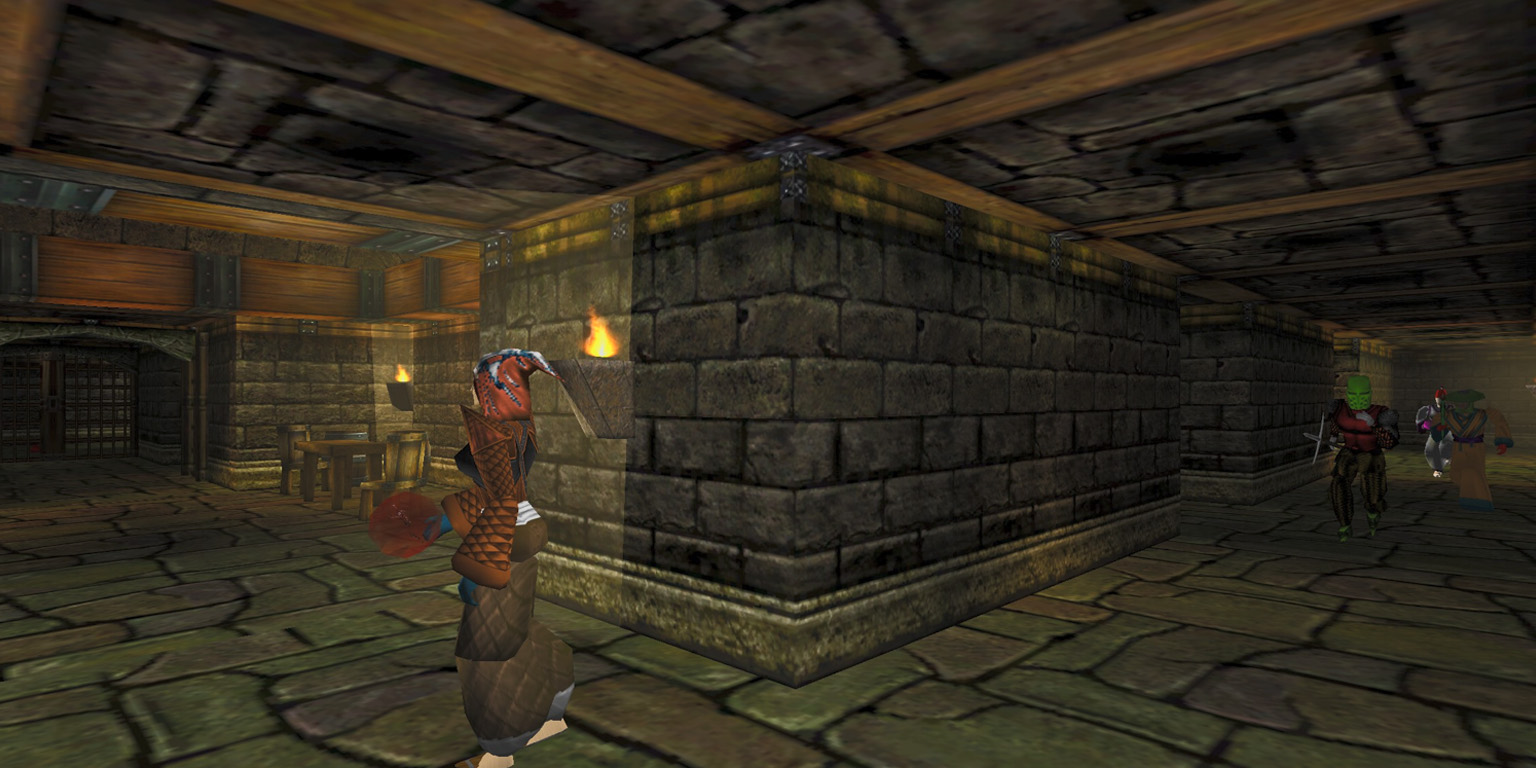
A heavily customized Asheron's Call experience, focused on the largely underutilized Osteth region of Dereth.
Features
Classic World
Dereth, like it's 1999! Revisit iconic towns before they were destroyed. Housing removed.
Reimagined Storyline
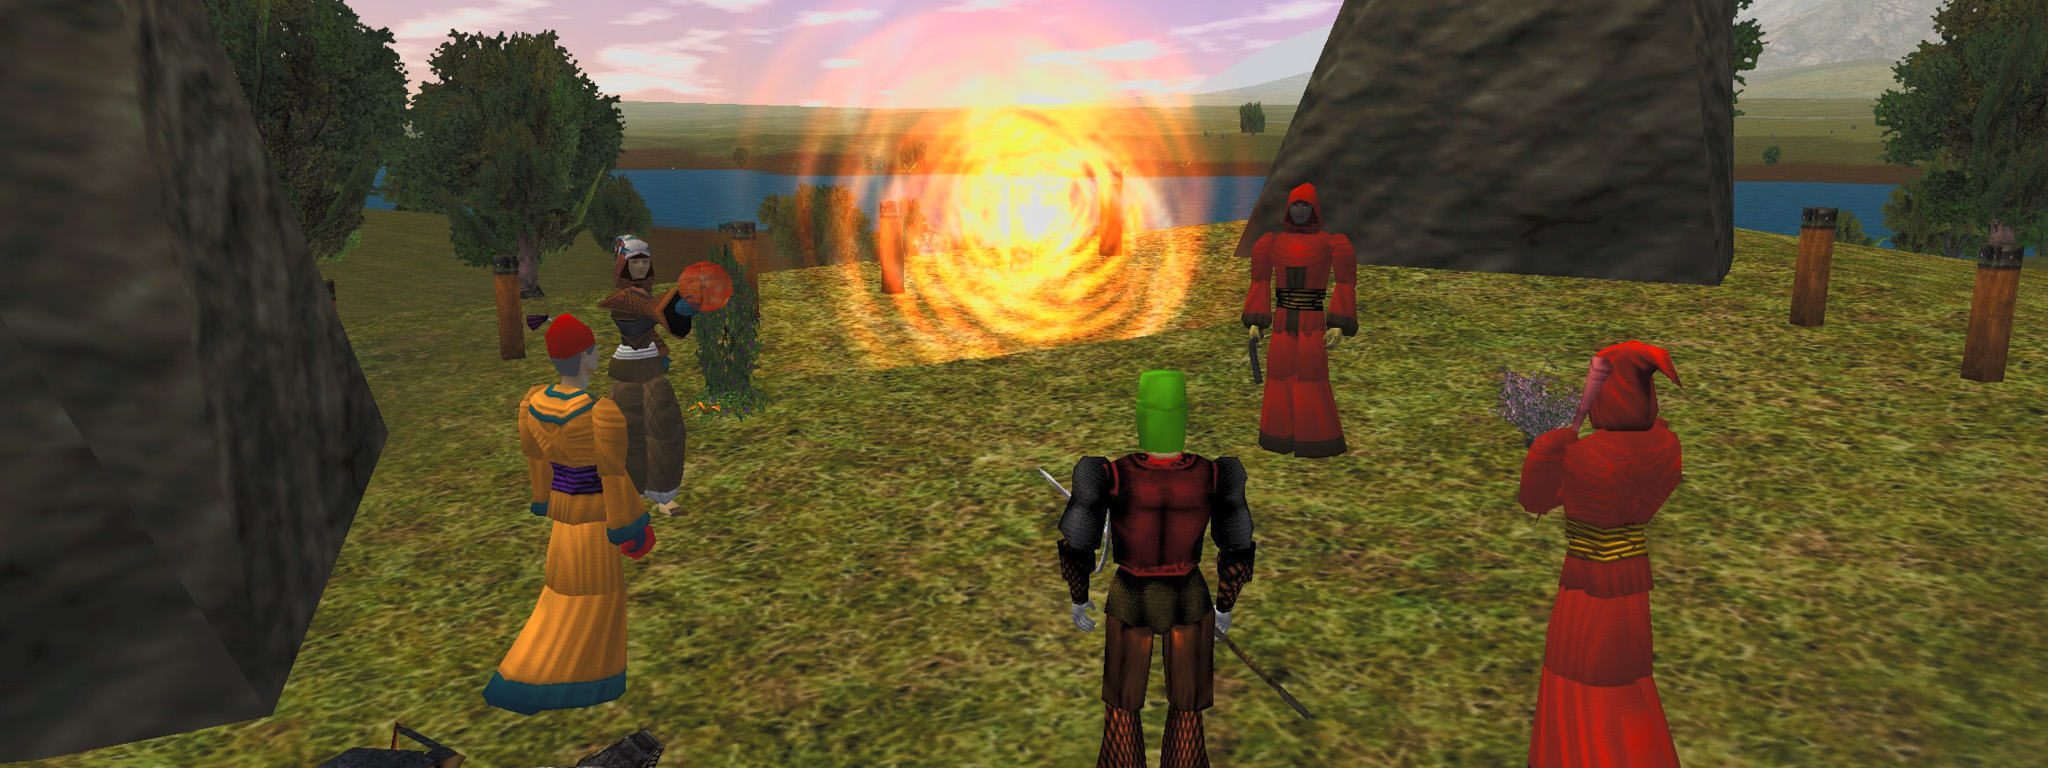
A new narrative thread woven through Dereth's familiar geography, taking the world's history in directions the original never went. Take part in live events that shape this new future.
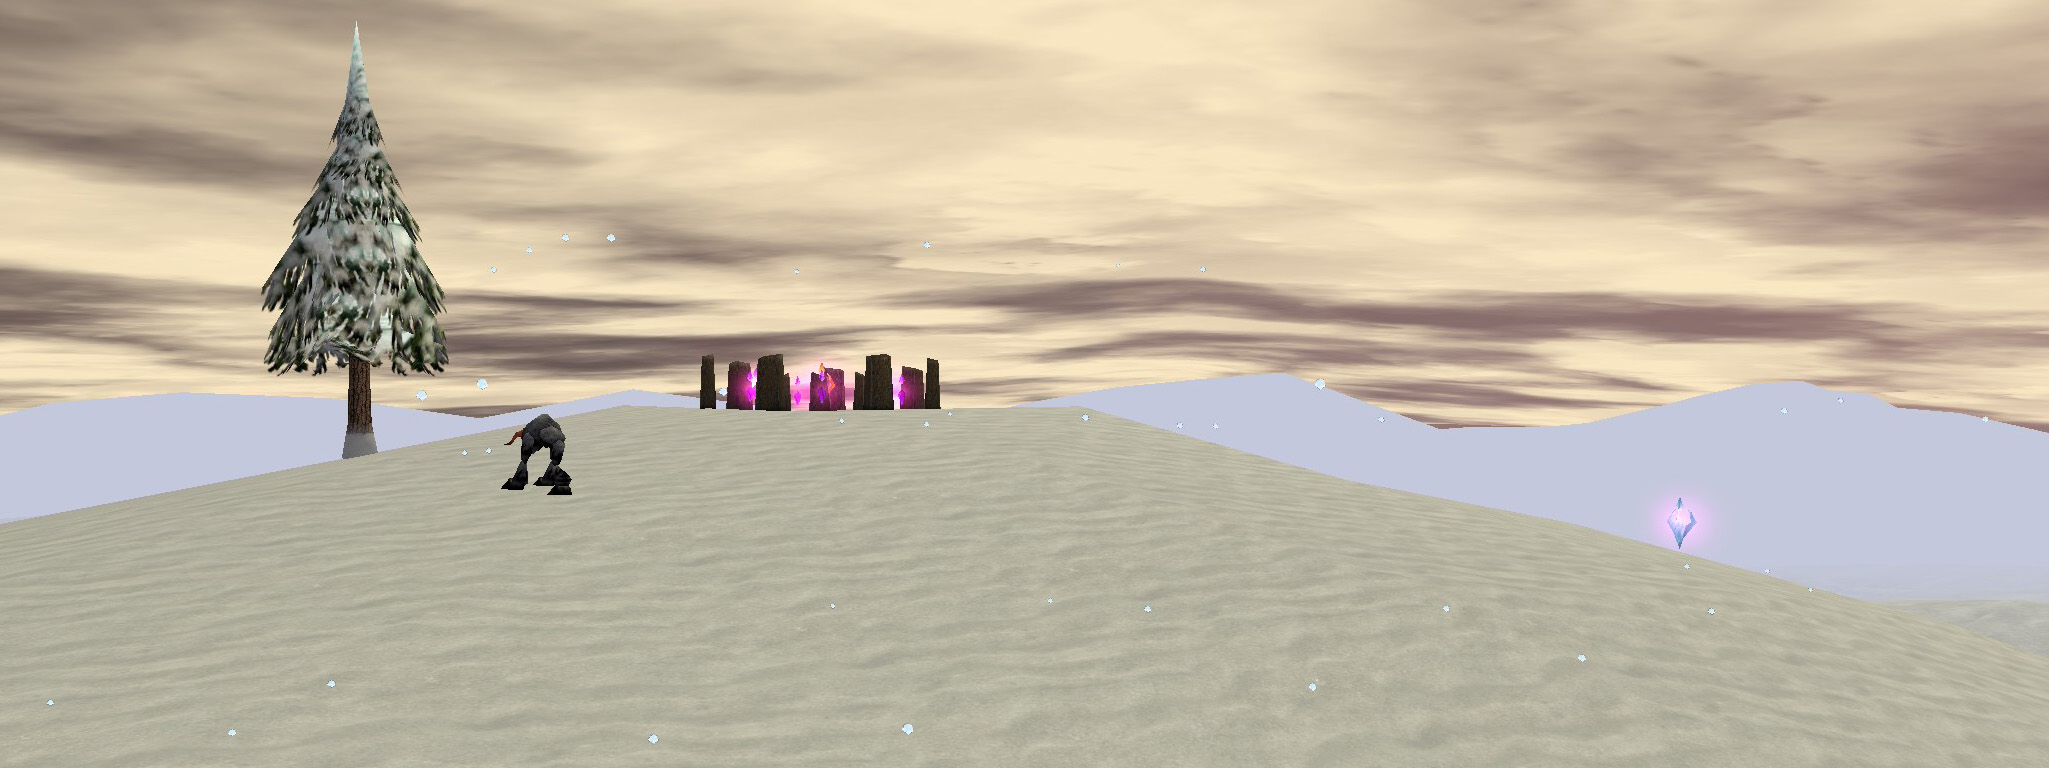
Seasonal Weather
Experience the seasons without having to manually touch your game files, as we push content updates throughout the year.
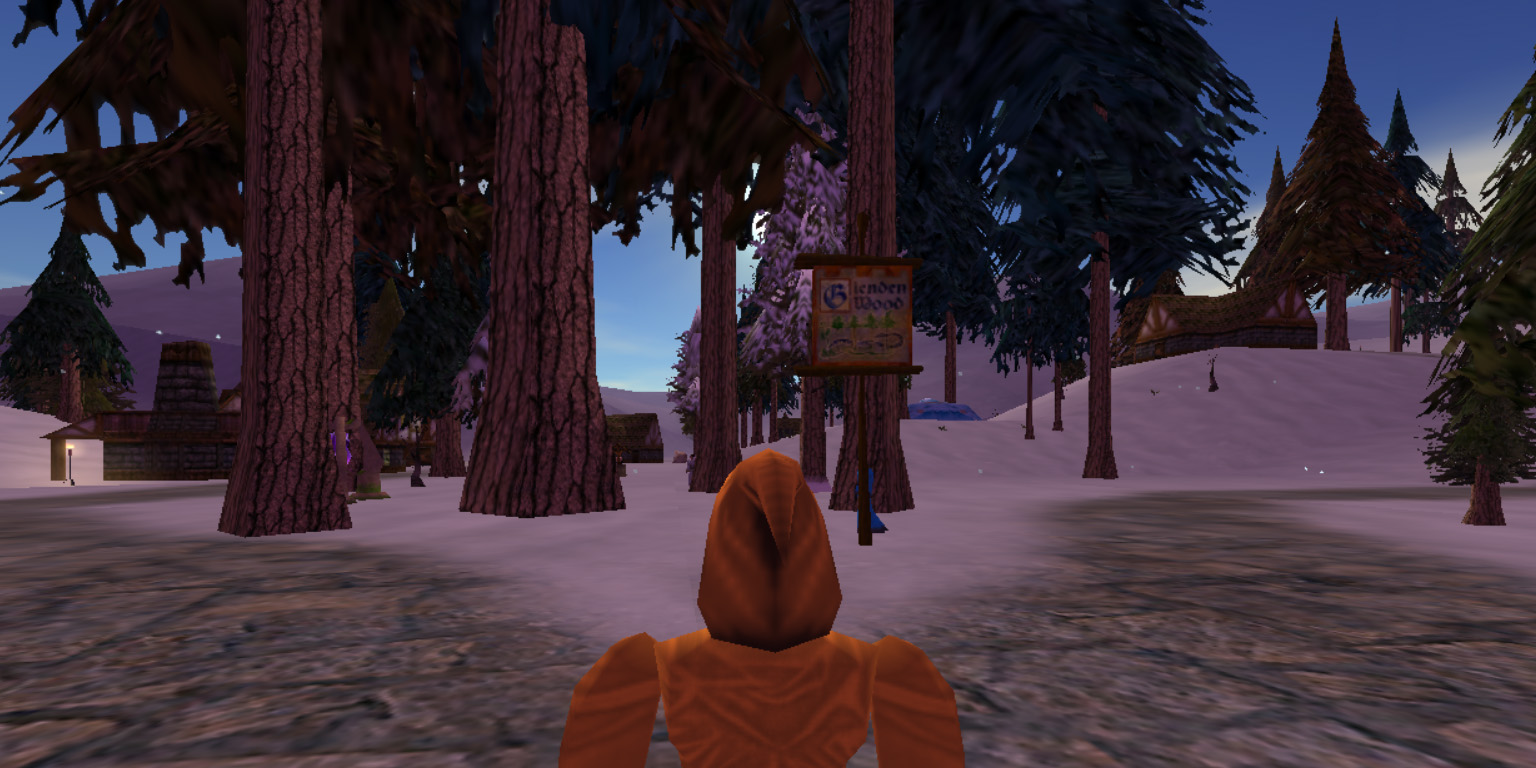
Overhauled Content
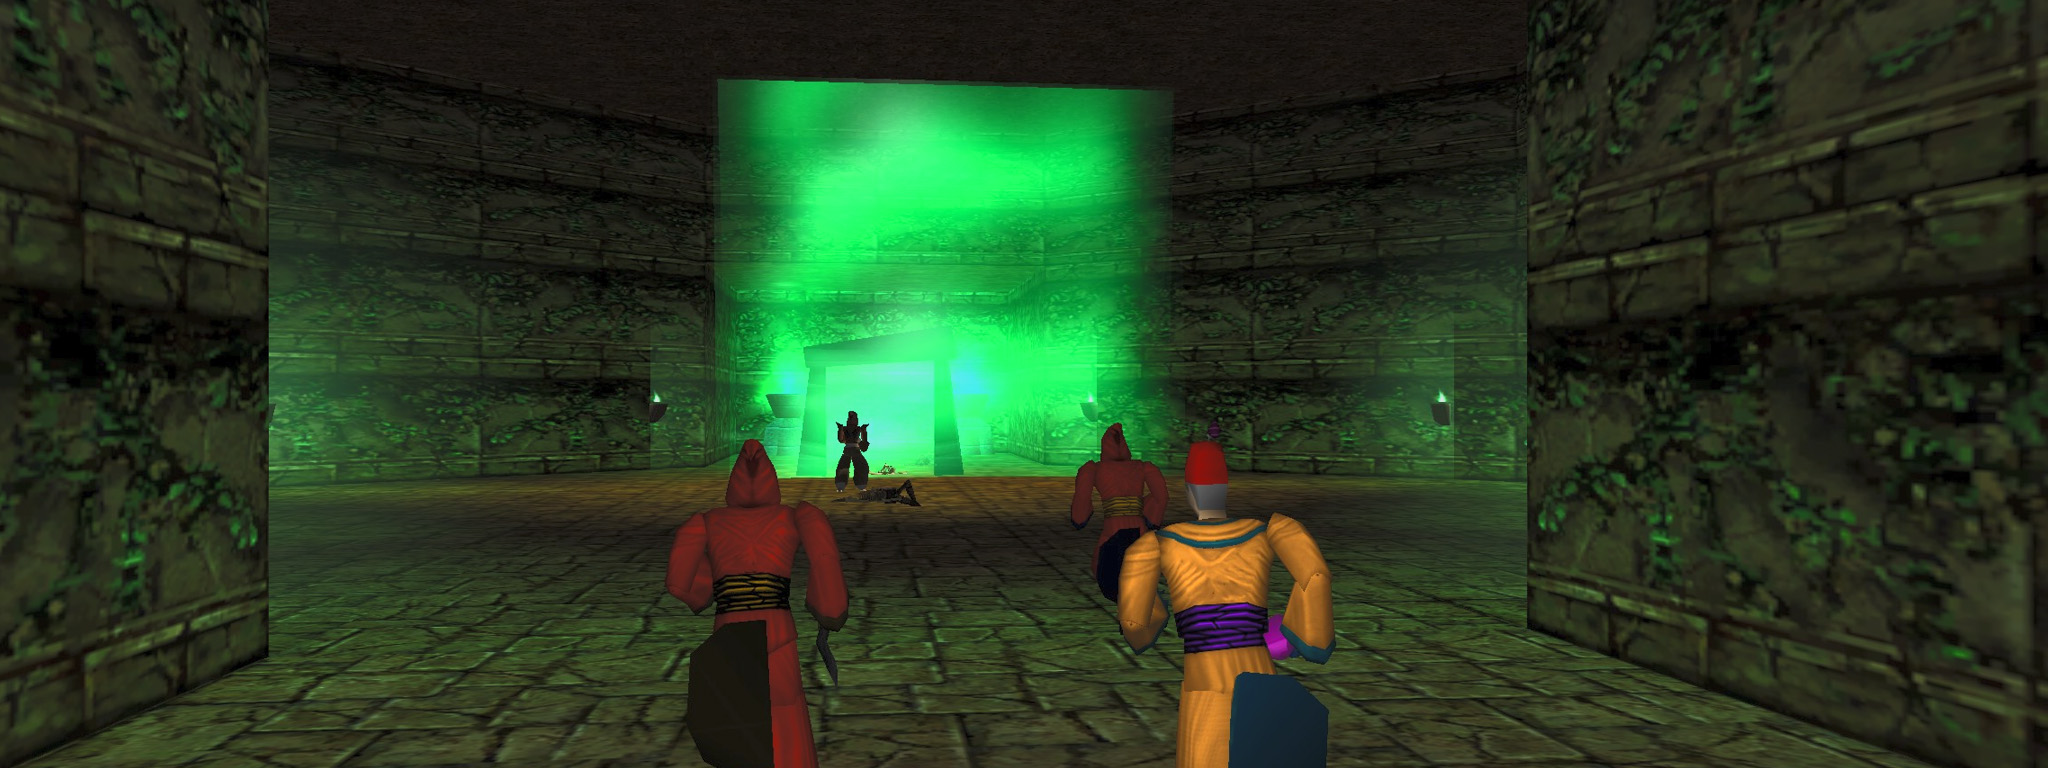
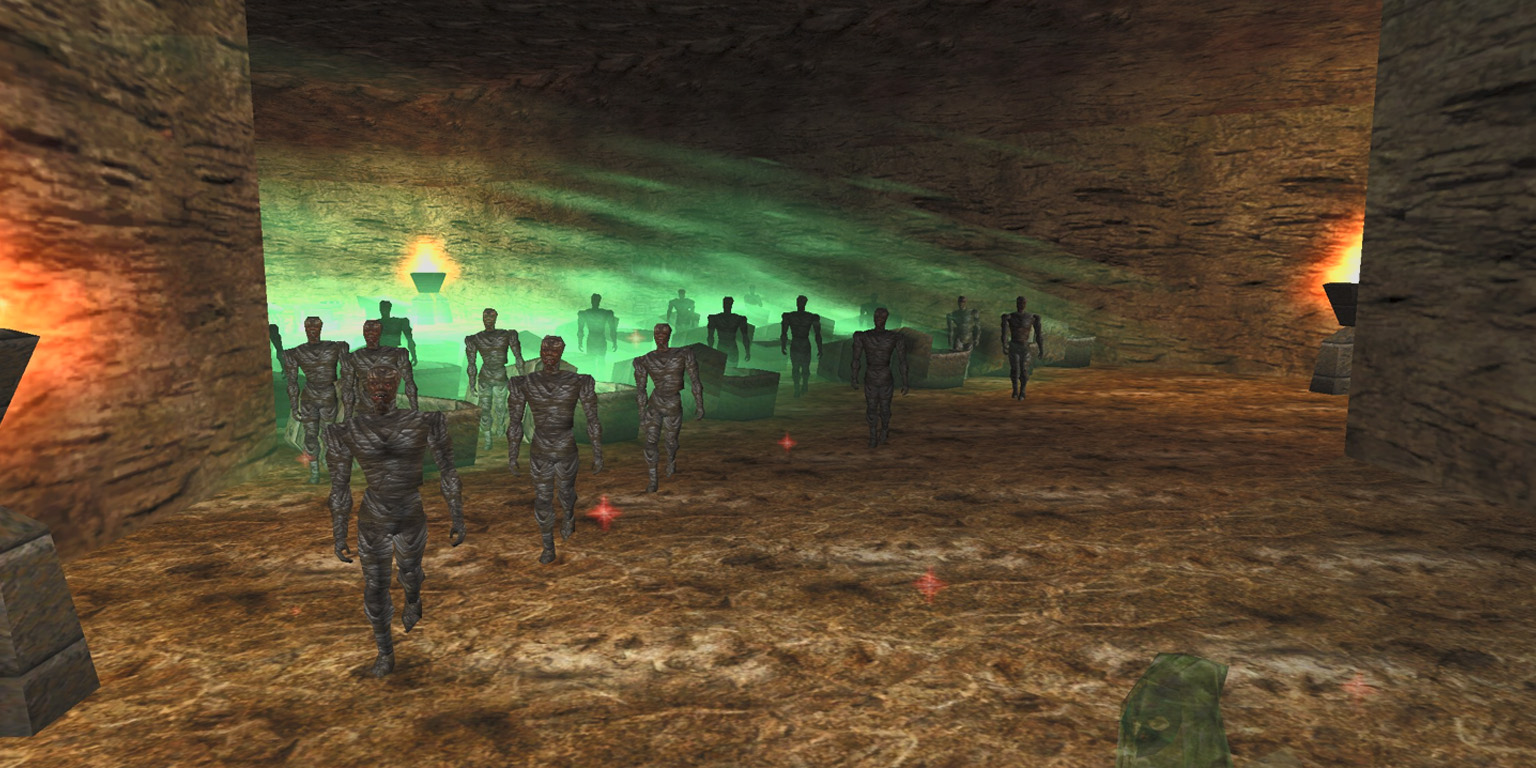
Landscape spawns replaced by hand to support a new overworld progression, focused on outdoor content. A new town-attunement system, supporting exploration. Many dungeons overhauled to be small-fellowship experiences. Two massive regions transformed into endgame content.
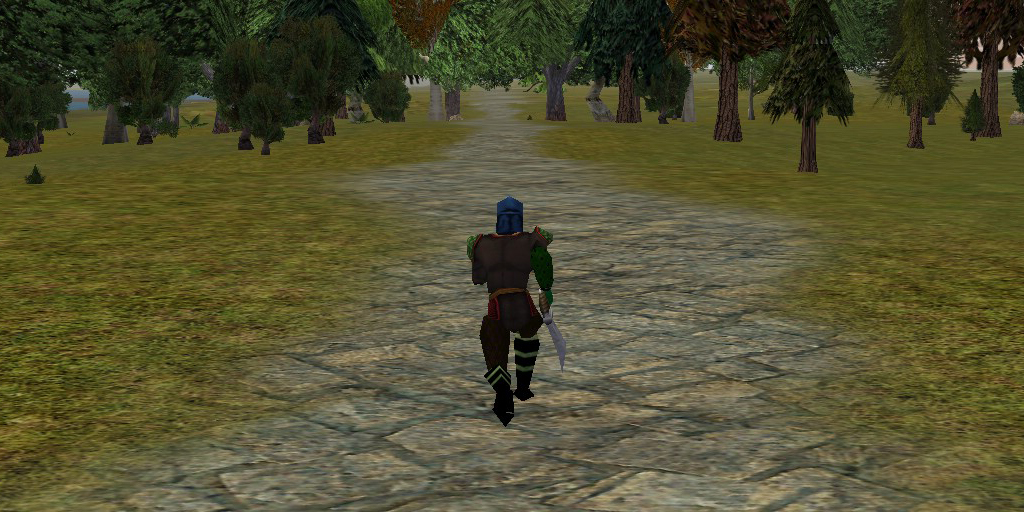
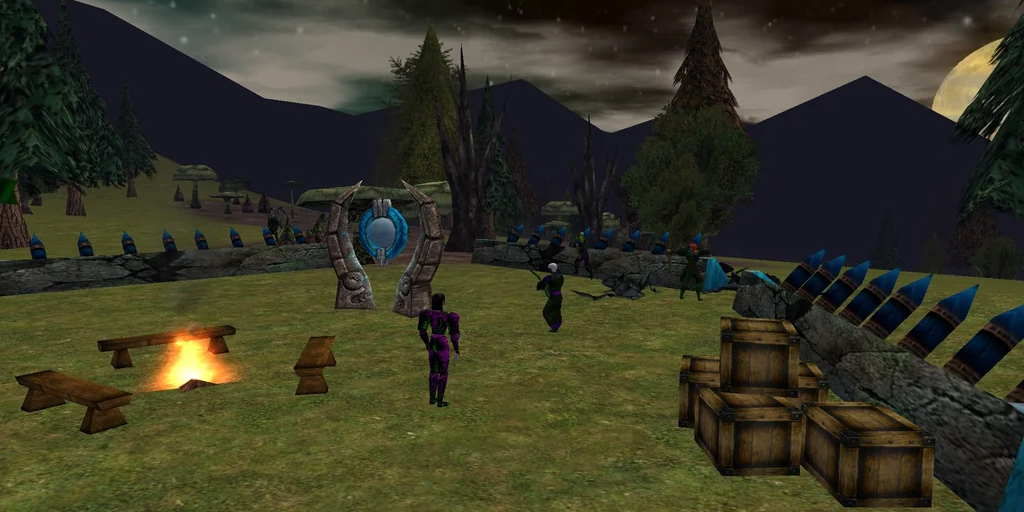
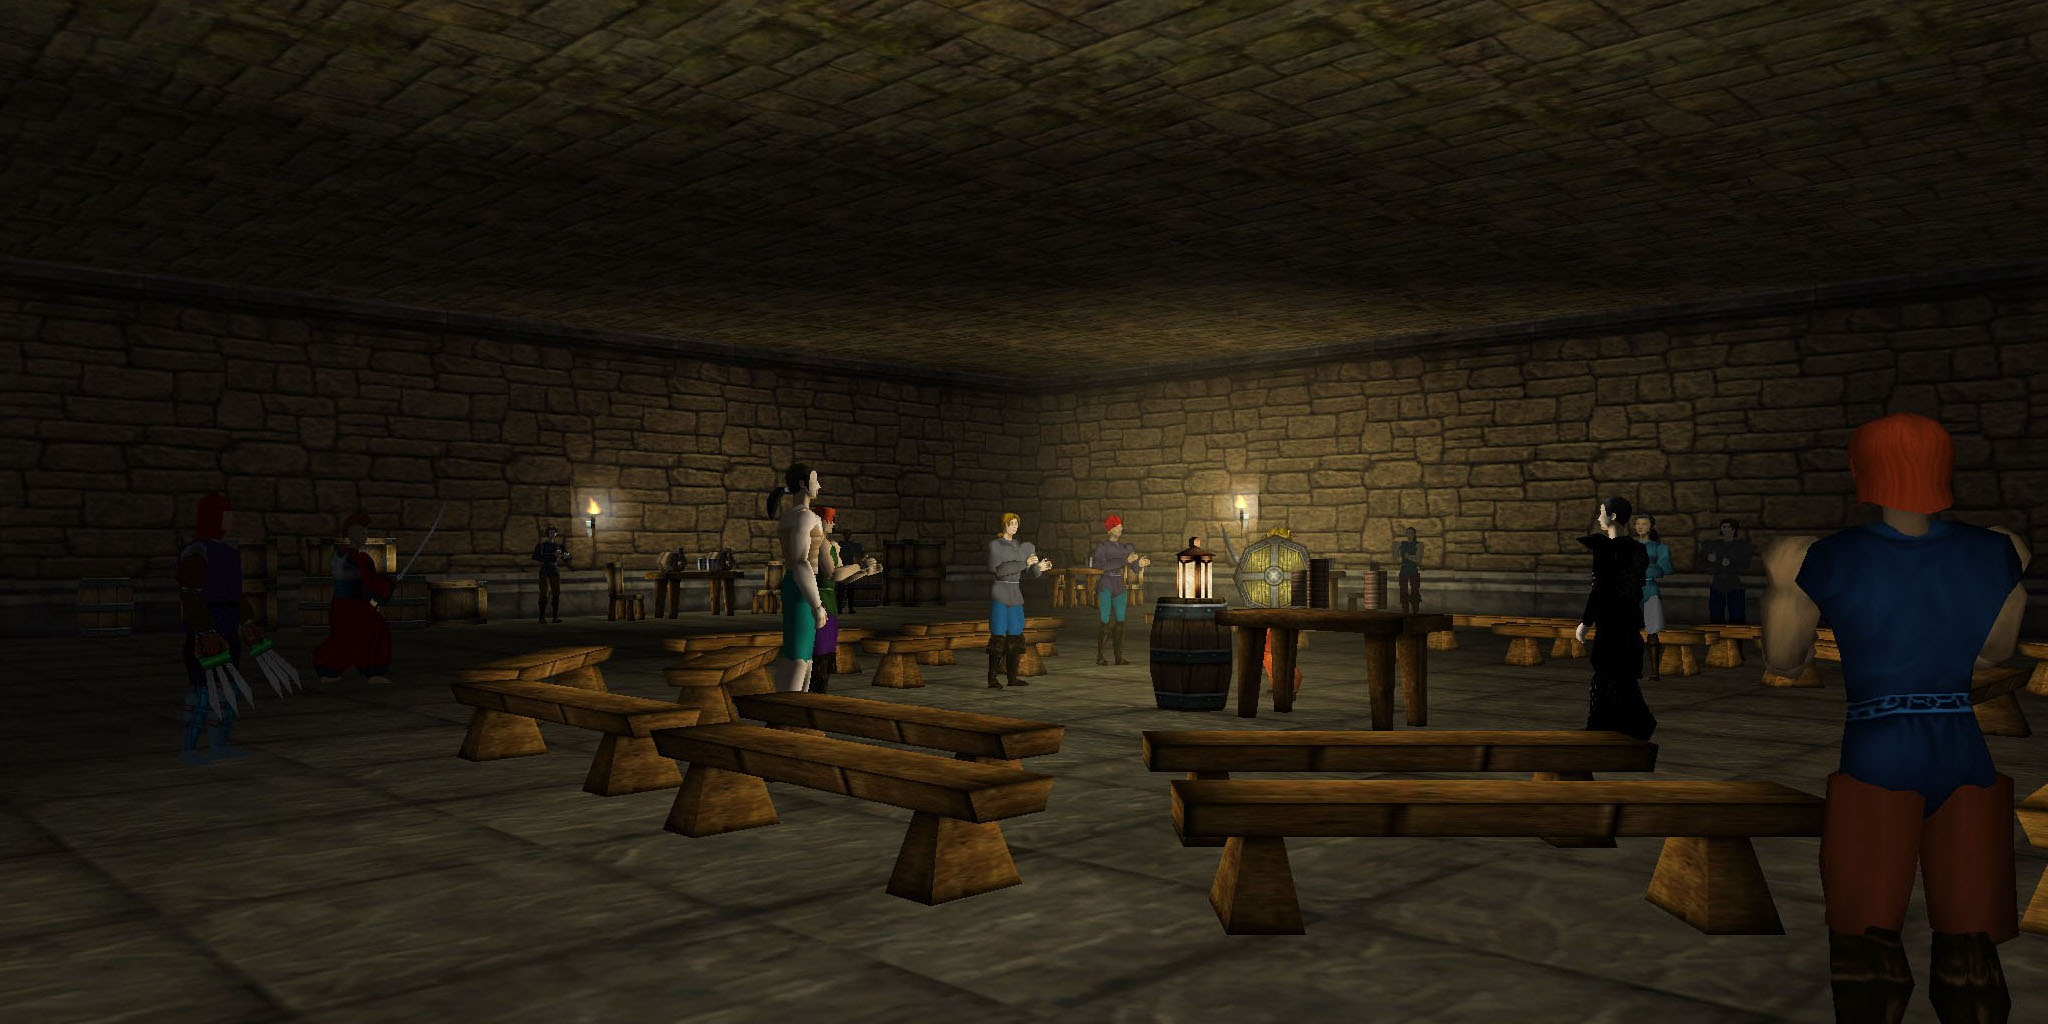
Overhauled Combat
Modernized combat systems while maintaining the classic AC feel. Rebalanced defenses, vitals, and spells. Over 20 added active abilities. New threat and stealth systems.
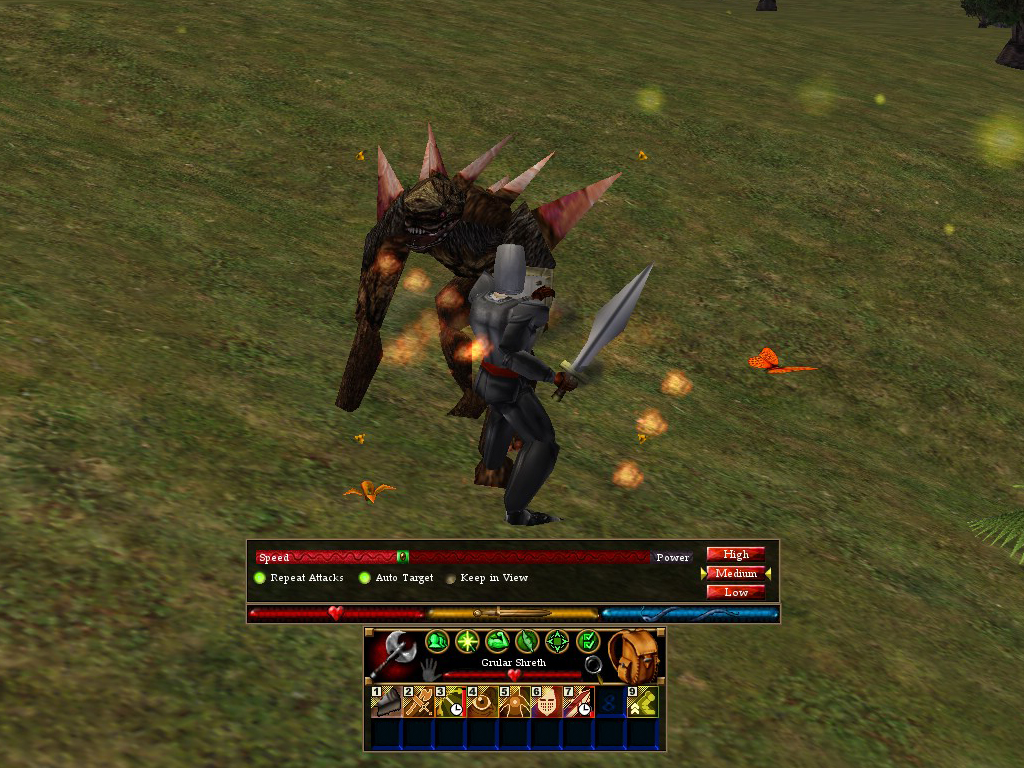
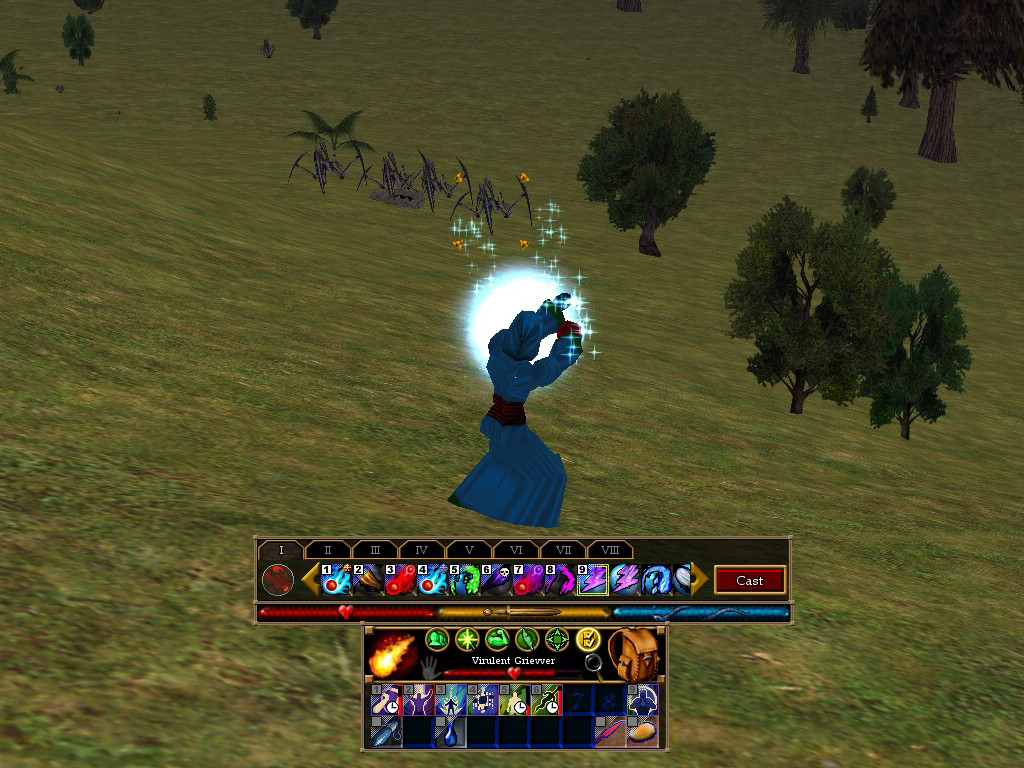
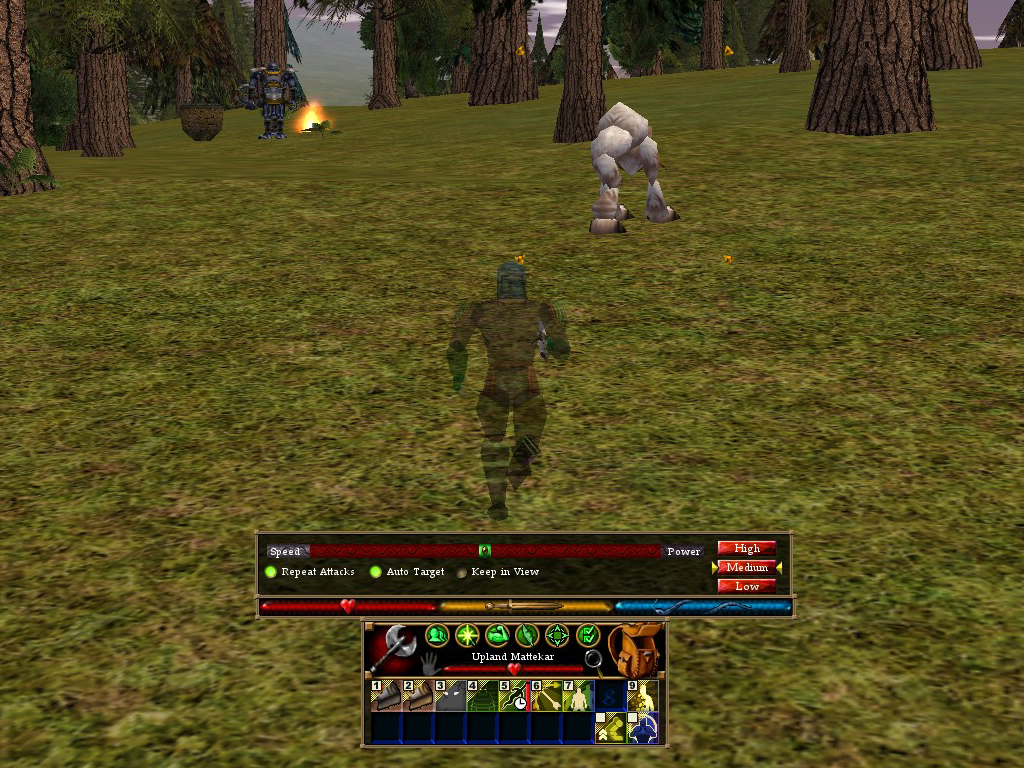
Overhauled Itemization
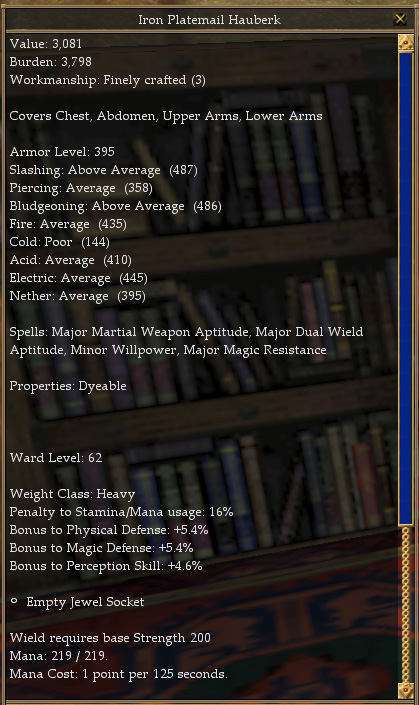
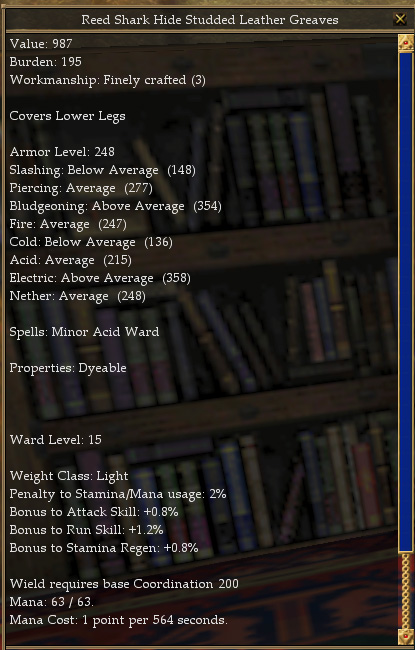
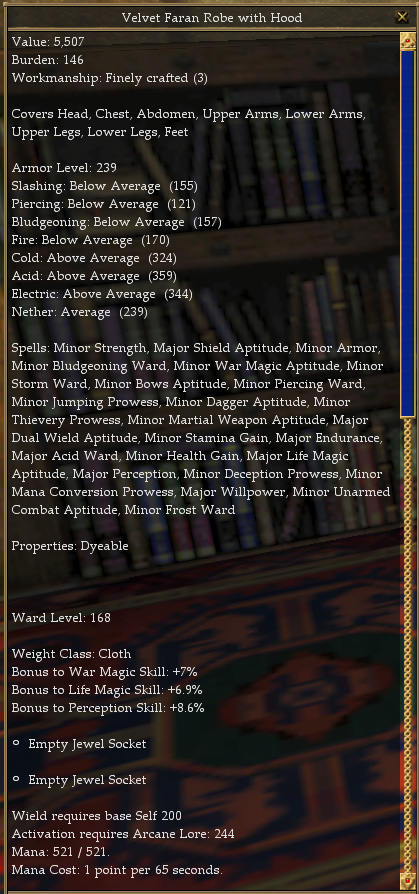
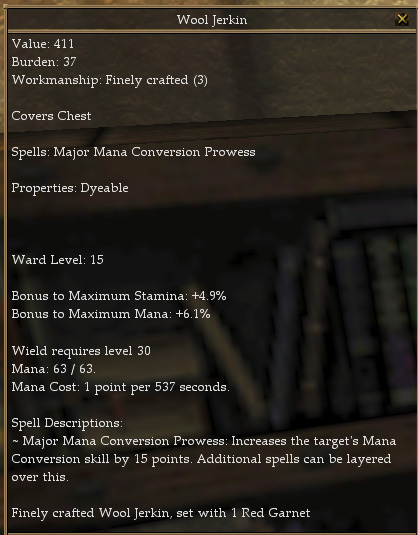
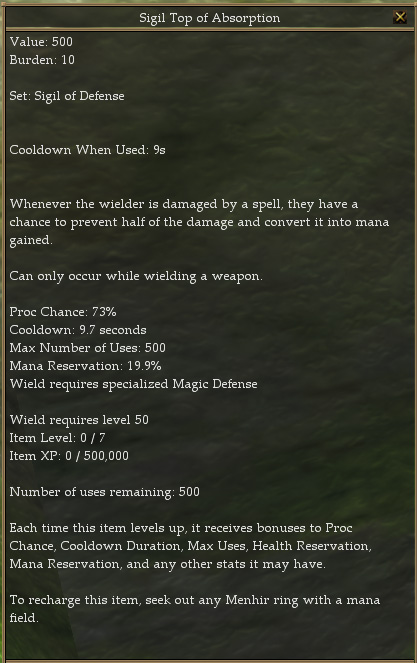
Rebalanced weapons, new mods, jewels & sockets, reworked imbues, a new armor weight-class system, a new stat: Ward Level, and a new item type: Sigil Trinket,
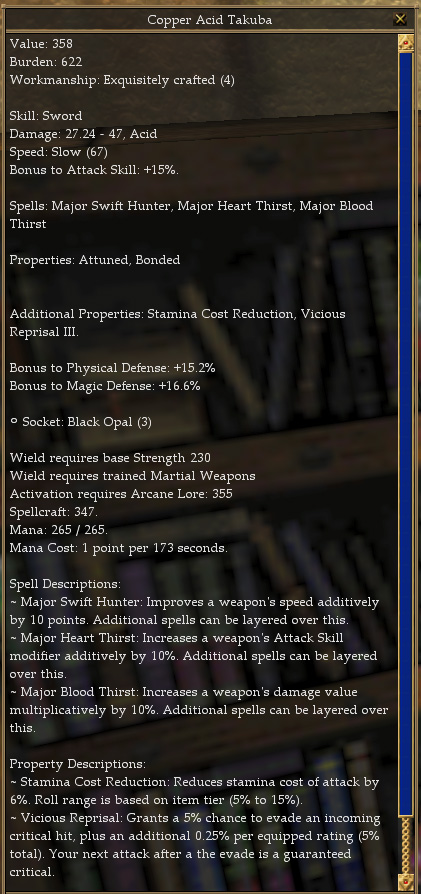
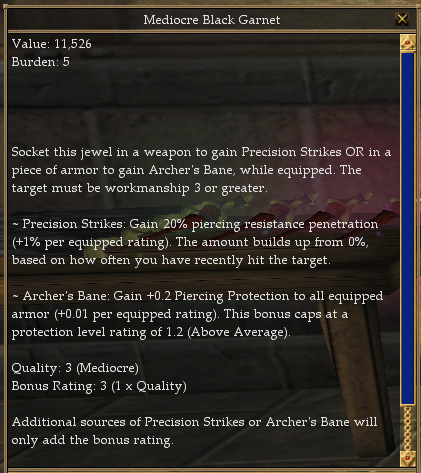
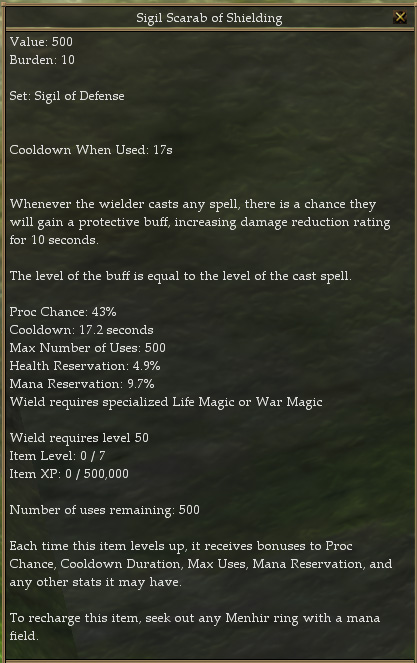
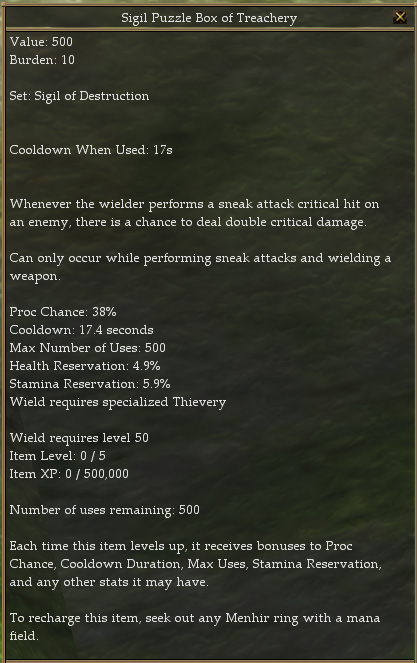
Overhauled Crafting
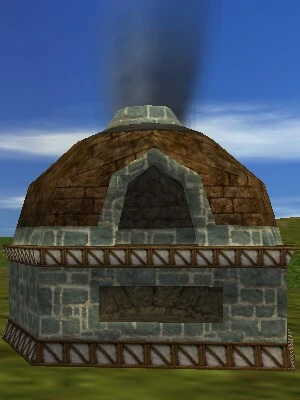
Train two crafting skills without the need of skill credits. Tinkering skills reworked into: Blacksmithing, Tailoring, Woodworking, Spellcrafting, and Jewelcrafting. Use monster trophies in Alchemy and Cooking recipes to create powerful buffs.
Banking
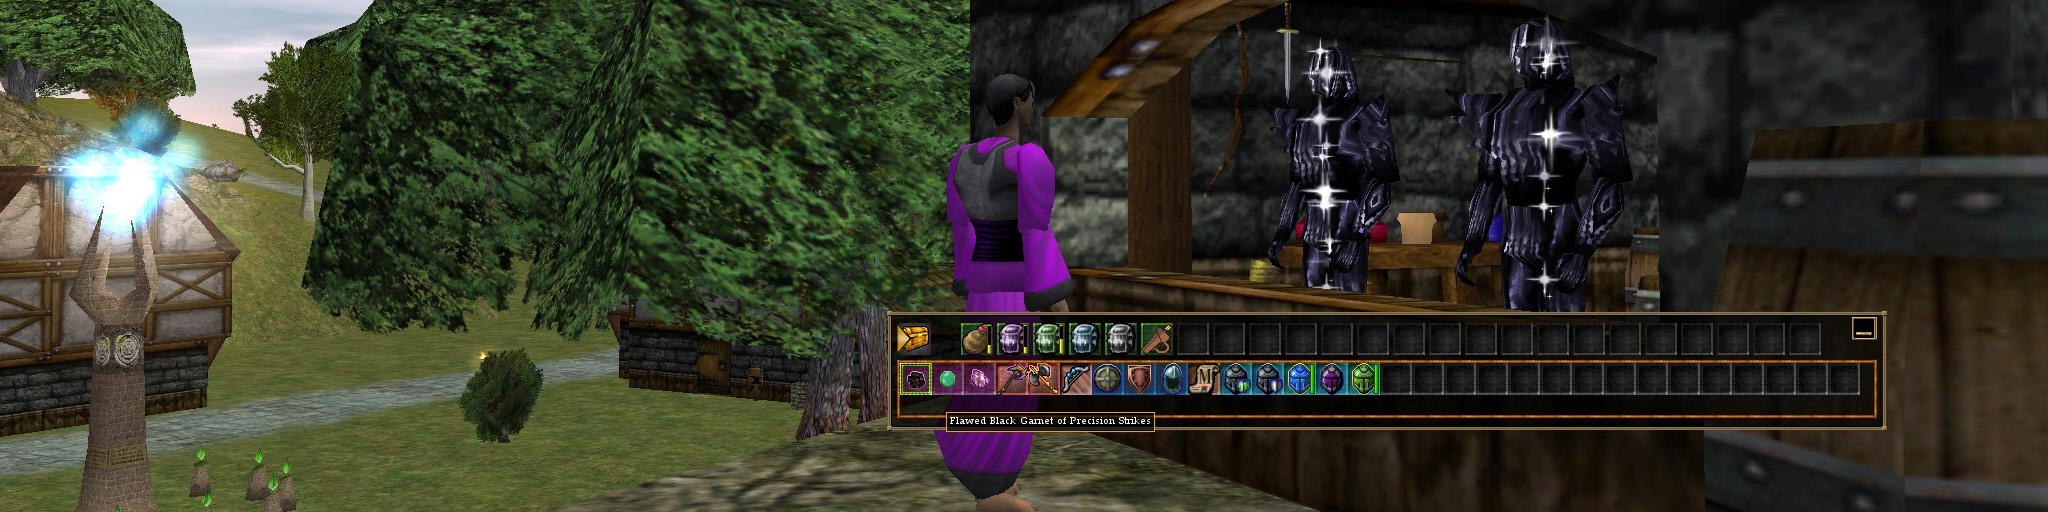
An player account item storage system, without the need for housing. Utilizing the client UI.
Asynchronous Trade Market
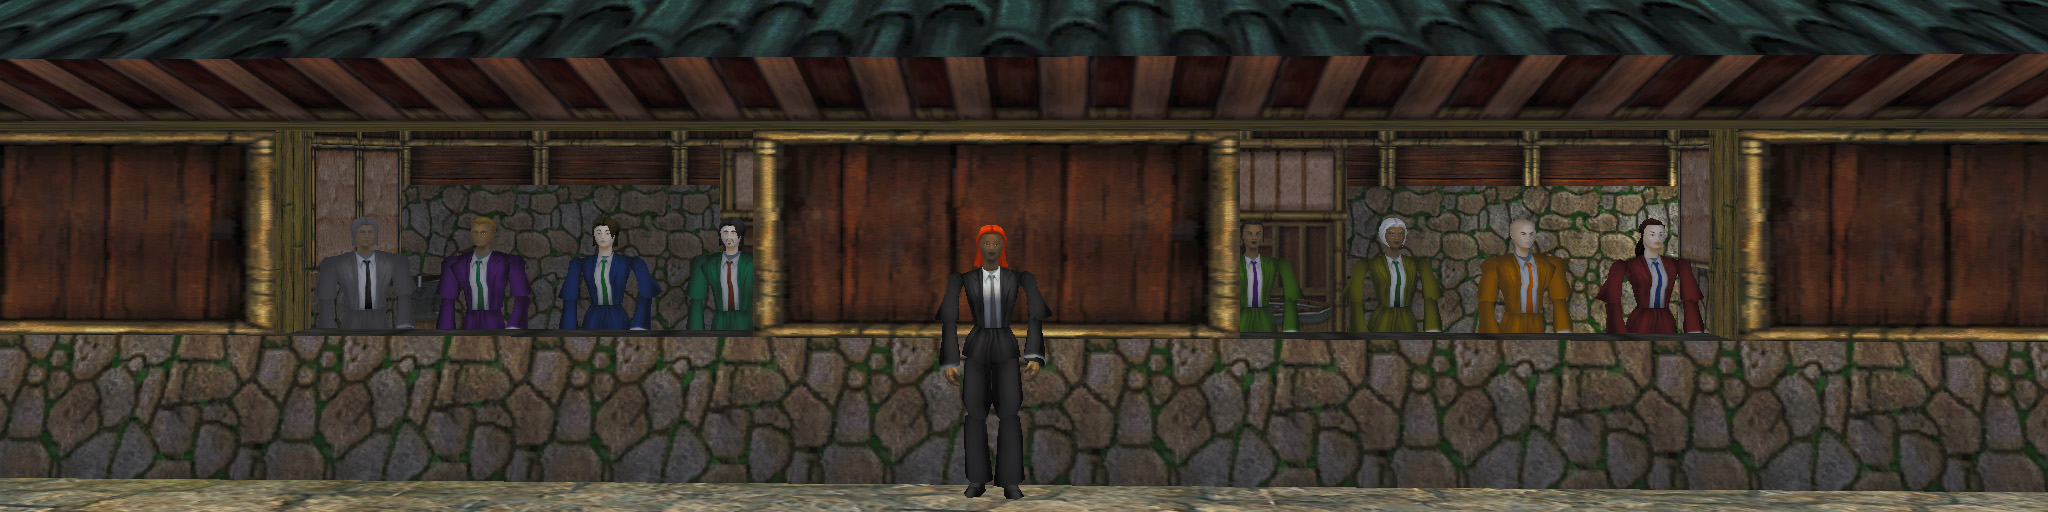
An in-game trade market where players can list and buy items without both parties needing to be online at the same time, all within the client UI.
How to Play
Three steps (and one optional one) and you're back in Dereth.
Download the client
Grab the Asheron's Call client and base game files from the emulator community's shared guide: emulator.ac/how-to-play.
Install Shadow Launcher
Download the latest release from the Shadow Launcher releases page and install it. Shadow is the recommended launcher for Daralet.
Detailed Shadow Launcher install steps
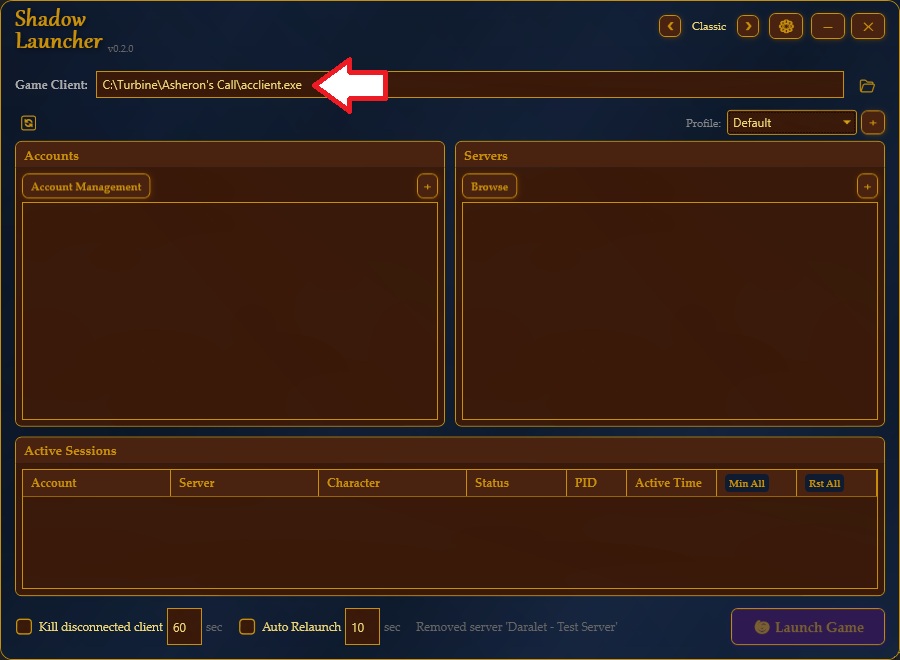
1. Point Shadow Launcher at your Game Client
At the top of Shadow Launcher, set the Game Client field to your acclient.exe (from the base game files installed in Step 1).
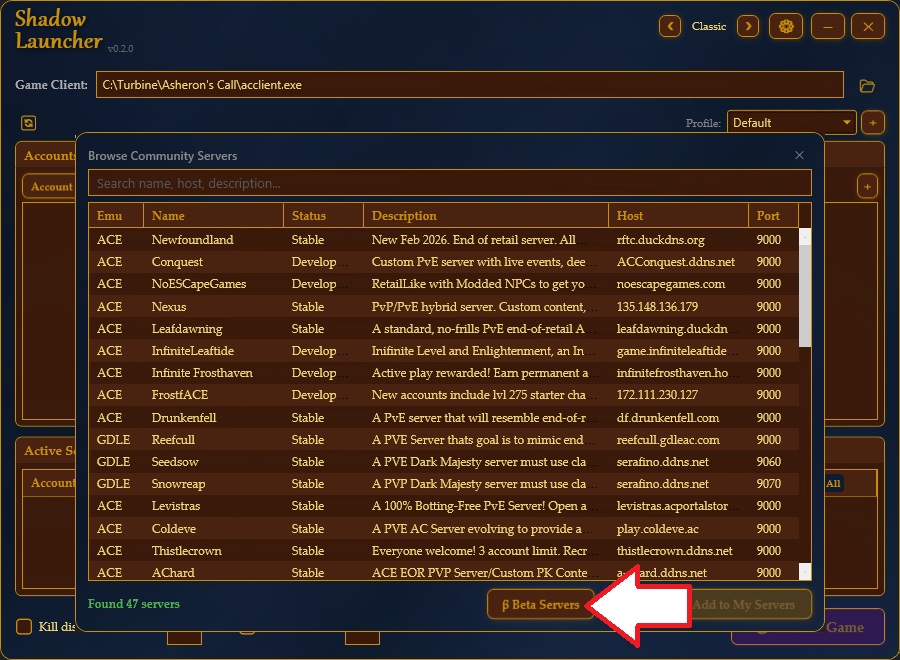
2. Browse community servers and switch to Beta Servers
Click Browse in the Servers panel, then click Beta Servers at the bottom of the list — Daralet is currently listed under Open Beta.
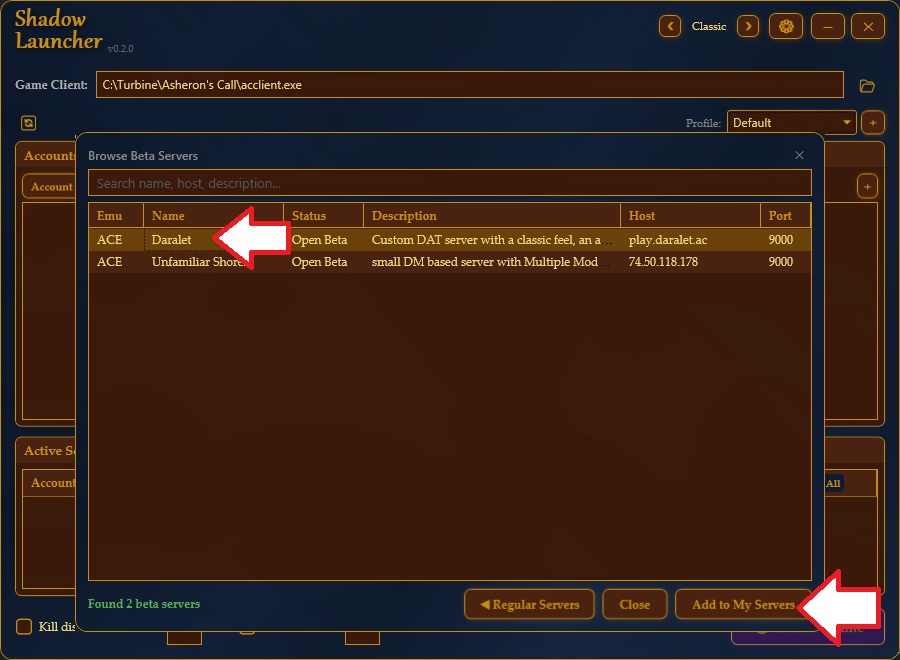
3. Add Daralet to your servers
Select Daralet from the Beta Servers list and click Add to My Servers.
| Field | Value |
|---|---|
| Host | play.daralet.ac |
| Port | 9000 |
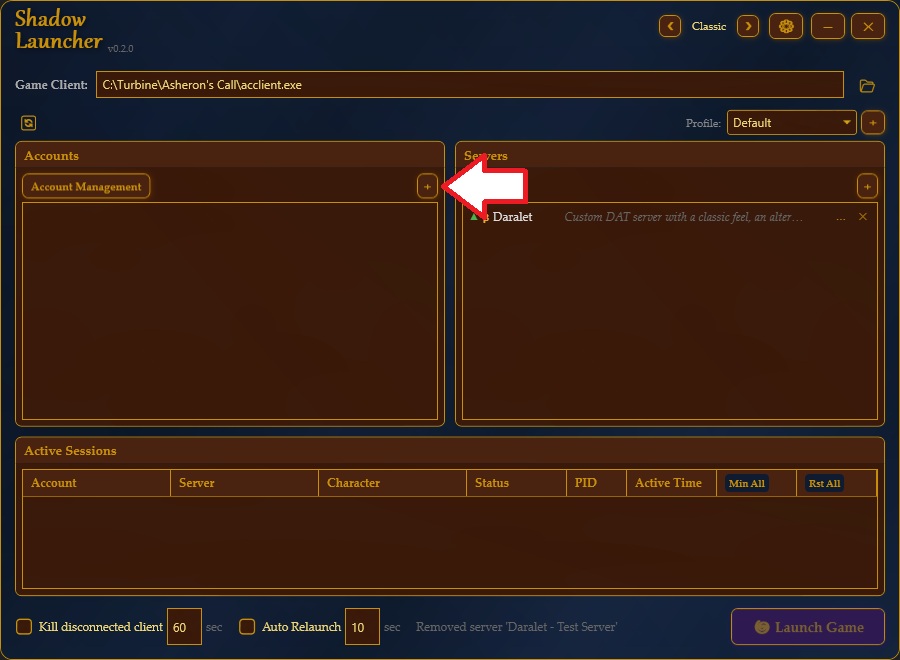
4. Add your account
Click the + in the Accounts panel and enter your account name and password.
5. Refresh DATs
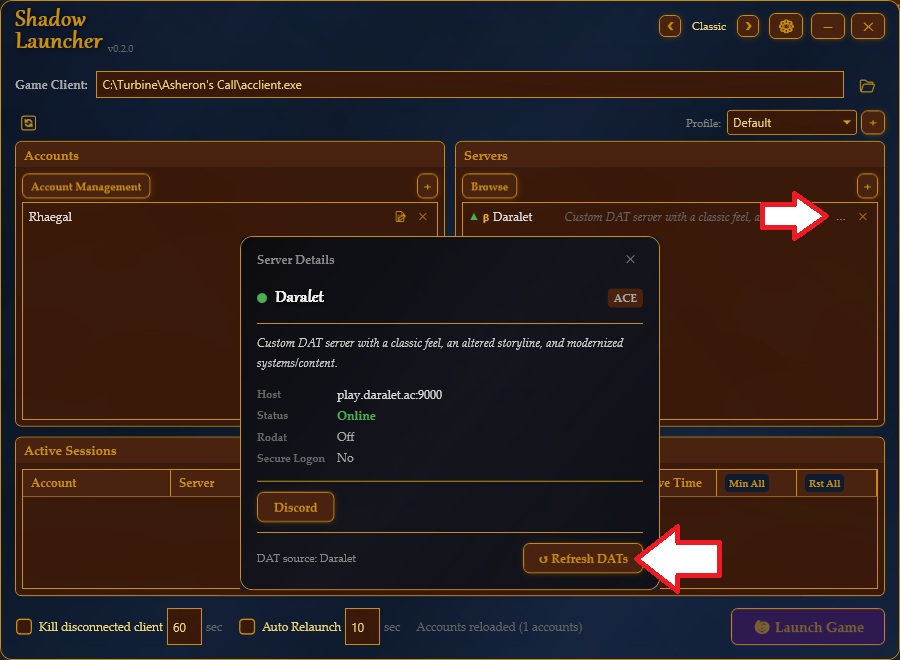
Click the ... next to the Daralet server entry to open Server Details, then click Refresh DATs to pull Daralet's dat patches.
6. Launch
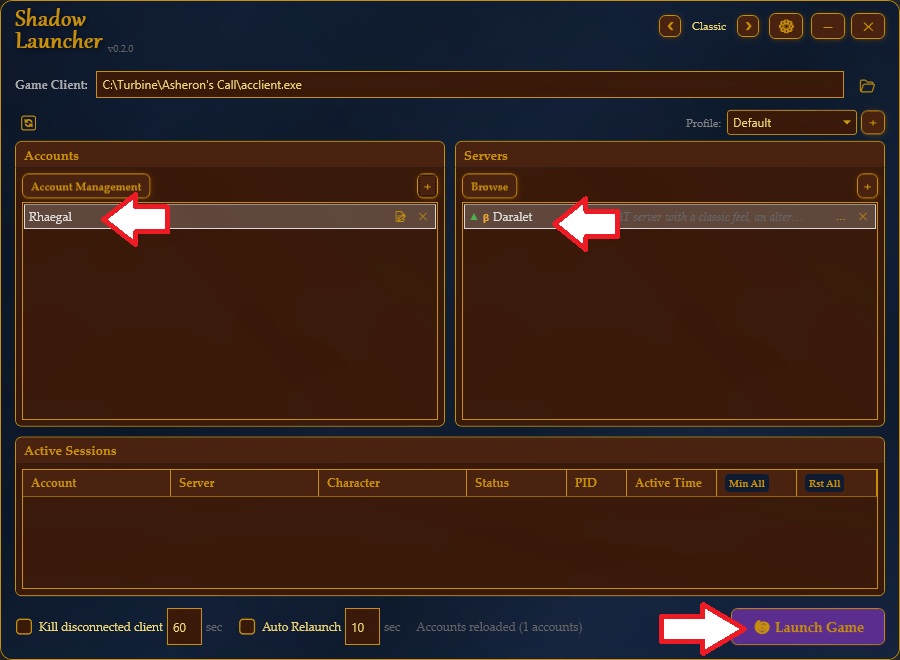
Select your account and the Daralet server, then click Launch Game.
Using ThwargLauncher instead?
ThwargLauncher works too, but Daralet's dat-patching requires a bit more manual configuration with it — Shadow Launcher is strongly recommended instead. If you'd still like to use ThwargLauncher, follow the detailed steps below.
Detailed ThwargLauncher install steps
Prerequisites
- Install Asheron's Call — see emulator.ac/how-to-play.
- Install ThwargLauncher.
Note: ThwargLauncher must be on the latest version. Go to Advanced View → Help → Update, or download the latest version from the link above.
Part 1 — Duplicate your client folder
Daralet needs its own copy of your Asheron's Call client files, kept separate from the copy you use for other servers.
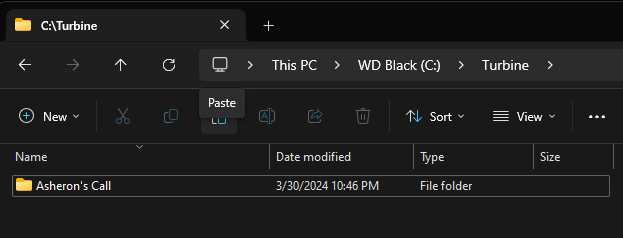
1. Open an Explorer window
Keyboard shortcut: Windows key + E.
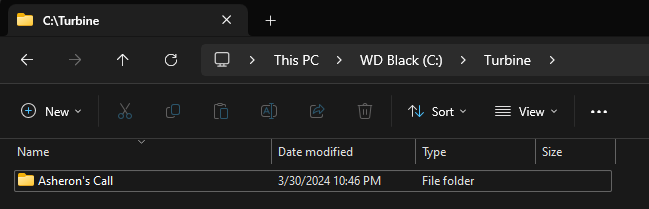
2. Navigate to your install's parent directory
By default, that's C:\Turbine.
3. Copy the Asheron's Call folder
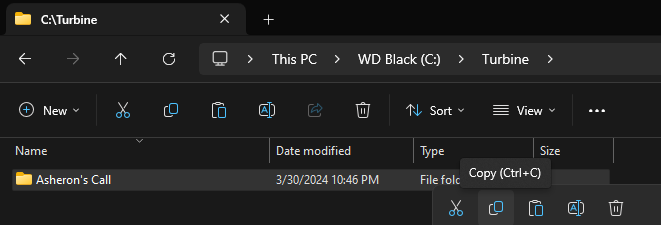
Select the Asheron's Call folder and copy it (Ctrl+C, or right-click → Copy).
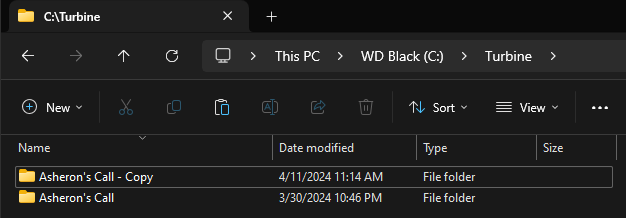
4. Paste the folder into the same C:\Turbine folder
It will be named something similar to C:\Turbine\Asheron's Call - Copy.
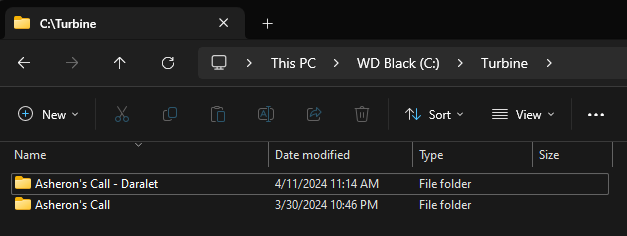
5. Rename the new folder
Rename it to Asheron's Call - Daralet.
Part 2 — Configure ThwargLauncher
6. Open ThwargLauncher
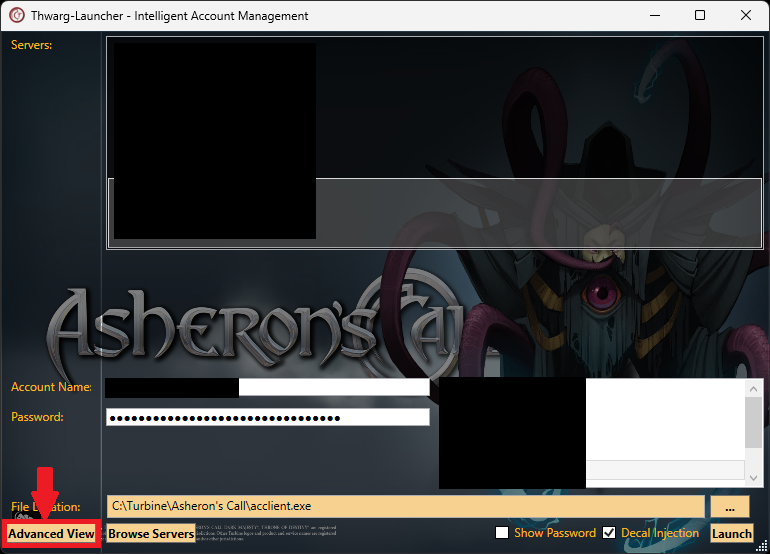
7. Switch to Advanced View
If you're on Simple View, click Advanced View in the bottom left.
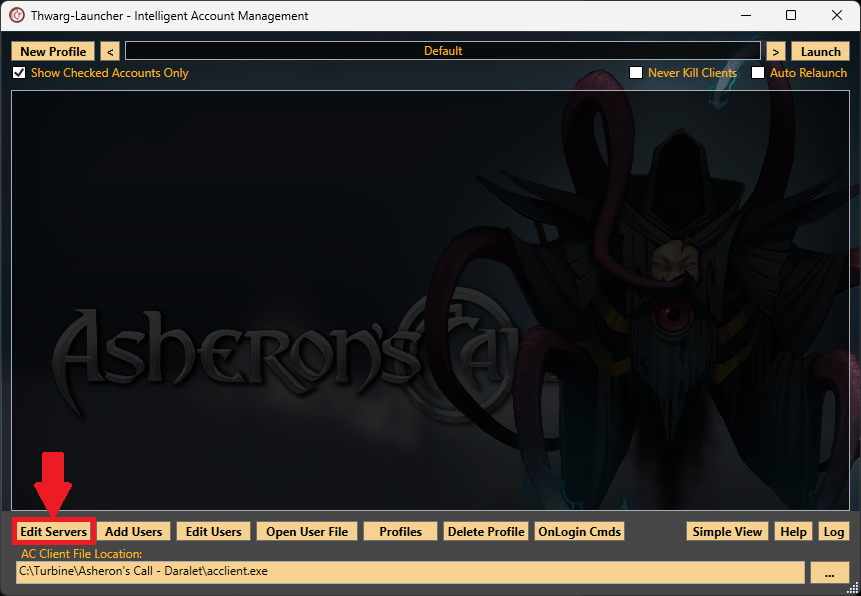
8. Open Edit Servers
Click Edit Servers in the bottom left of the Advanced View screen.
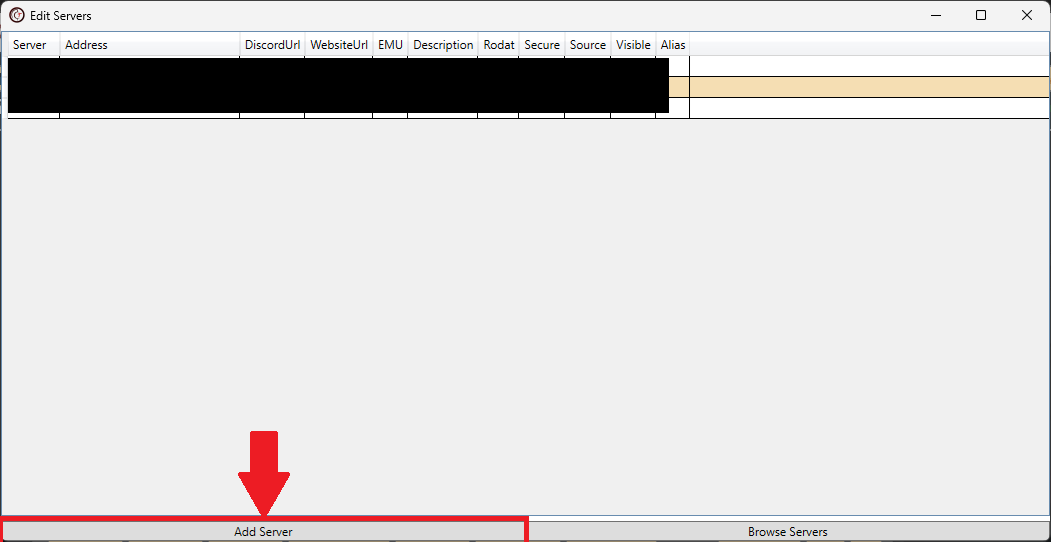
9. Add a server
Click Add Server in the bottom left of the Browse Servers window.
10. Enter Daralet's connection details
In the Add a Server window:
| Field | Value |
|---|---|
| Server type | ACE Server |
| Server Name | Daralet |
| Server IP | play.daralet.ac |
| Server Port | 9000 |
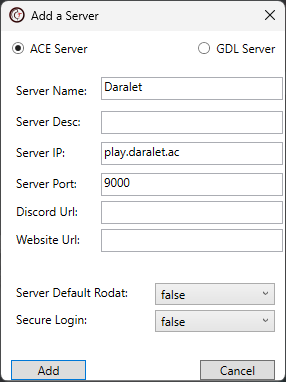
11. Add the server
Click Add. You'll be brought back to the main Advanced View window.
12. Add your account
Add an account and password (if you haven't already) using the Add User menu. We recommend prefacing your account name with daralet- so it's easy to identify in the next steps.
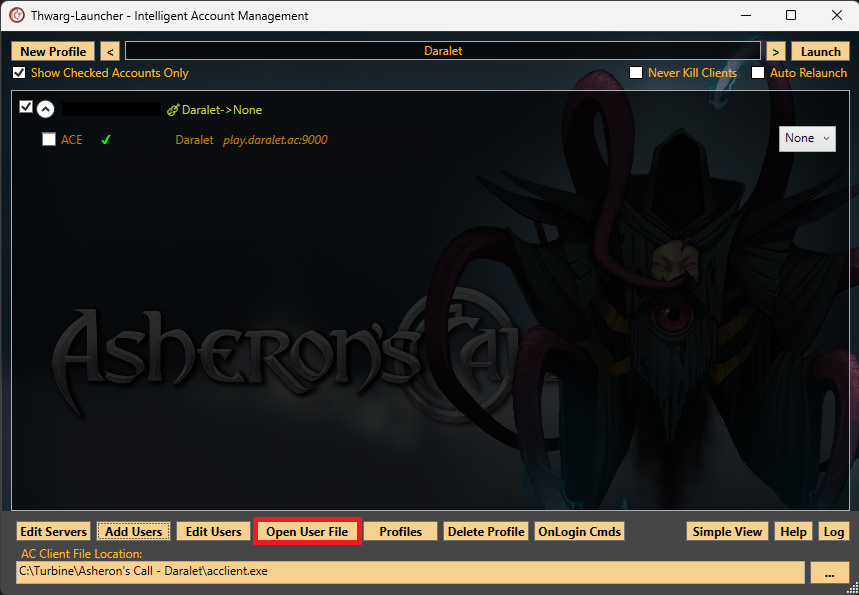
13. Open your user file
Click Open User File at the bottom of the Advanced View window. It opens in Notepad (or your default text editor).
14. Find your Daralet account's LaunchPath
You'll see a list of your accounts. Find the one you'll use for Daralet — prefixed with daralet- if you followed step 12 — and note its LaunchPath.

15. Change the LaunchPath
Set it to match the folder you created in Part 1:
LaunchPath=C:\Turbine\Asheron's Call - Daralet\acclient.exe
The full line should read something like:
Name=daralet-user,Password=YOUR_PASSWORD_HERE,LaunchPath=C:\Turbine\Asheron's Call - Daralet\acclient.exe
Note: spacing matters — use the exact folder path from Part 1, step 5. Save the file when you're done.

16. Launch
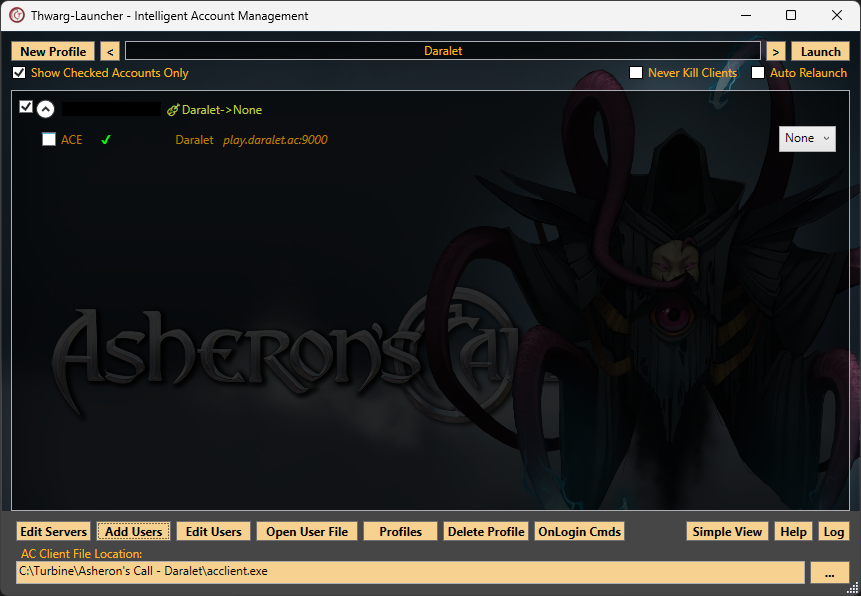
Make sure your account is checked and the Daralet server is selected, then click Launch in the upper right.
Log in and create a character
Choose a heritage, name your character, and step into Dereth. See the Character guide if you want help deciding, or plan your build ahead of time with the Character Planner.
(Optional) Install Decal
Decal is a plugin environment for Asheron's Call — see the Plugins & Decal list on the Plugins, Files, & Commands page for Decal and the recommended plugins to go with it.
FAQ
Which launcher should I use?
Shadow Launcher is recommended — see Step 2 above for the full setup guide. ThwargLauncher works too, but needs more manual configuration.
Can I use multiple accounts?
No — see the Rules & Policies page's one-account-per-IP policy for the current answer.
My client crashes when I login
If you're using ThwargLauncher, this may be because you have the wrong client directory targeted. Sometimes this field can revert after your first launch.
Otherwise, you may have corrupted dats. Use the Refresh DATs option in Shadow Launcher, or download the latest dats manually here.
Can I UCM/ACM (bot)?
No — see the Rules & Policies page's no-UCM/ACMing policy for the current answer.
What is considered botting?
Any program that automates movement, combat, trade, or portal bots.
Allowed: Automated looting, crafting, and 1-button heal.
Where do I report a bug or ask for help?
Report bugs in the bug forum on our Discord.
Rules & Policies
Daralet is small enough that the rules stay simple — but they're enforced.
Code of Conduct
- Follow our Code of Conduct and Discord's Terms of Service.
- One account limit. You may only create one account per IP address. Multiple accounts will be banned. Overrides are available if multiple people play per household. DM an Admin or Envoy.
- No UCM/ACMing. There is a zero tolerance policy for botting. If you are found to be botting, you will be banned. You may use VTank, UB, or similar to loot, craft recipes, or tinker. Any form of combat macroing, autonav, and combat metas are strictly forbidden.
- Do not send unsolicited Discord notifications. The use of @everyone and @here is strictly forbidden. Unsolicited direct messages (DMs), mentions, or friend requests are not allowed unless permission is granted in public channels. Replies to previous messages are allowed.
- Be civil and professional. Personal attacks, harassment, hate speech, and offensive language will not be tolerated.
- Safe for work content only. Pornographic, sexual innuendo, and extremist content is strictly forbidden.
- Admins and Envoys always have the final decision. Use a direct message if you would like clarification.
Always...
- Be respectful. Our community is for everyone regardless of age, gender, race, sexuality, nationality, creed or disability. Treat everyone with the same respect you would expect to receive yourself. We welcome diversity, so we will not accept any form of marginalization, hateful language, ableist language, bullying, or discrimination. Diversity enriches our lives, and when we all play, we all win.
- Welcome new players – we were all the 'newbie' once! Trying to make someone else feel worse so you feel better doesn't work – it is much easier, and more fun, to enjoy the experience together! Help them and set a good example. They could be your new ally or comrade!
- Keep it appropriate. Keep the bad language amongst friends, and don't post anything NSFW – this has no place in the Daralet community. We all have opinions of the world, but not everyone wants to hear them whilst playing games. A lot of people play Asheron's Call to escape the real-world – let them!
Remember…
- It's just a game! Asheron's Call is supposed to be fun. If you start getting frustrated or angry, it's ok to take a break. Don't ruin your own, or someone else's, experience – it could lead to a report being filed against you, and in an extreme case, some enforced and extended leave from your favorite game.
- It's not real! It's all made up! We will not allow arguments in favor of fascism or racism in our community. If that's the community you want, you're in the wrong place.
- It's public! What you post will be seen by others, so make sure you are comfortable with what you share. Don't disclose your own, or other people's, real-life personal information. Threatening to do so will have actions taken against you.
Never…
- Discriminate against anyone based on who they are. As stated previously, our community is for everyone regardless of age, gender, race, sexuality, nationality, creed or disability. Prejudice of any kind is totally unacceptable.
- Harass, bully, threaten, marginalize, demean, intimidate, or threaten others to do so. None of these behaviors are acceptable and will not be tolerated at all. Any activity you engage in that targets an individual with the aim of upsetting them or targeting them unfairly constitutes bullying. Repeated activity of this nature is harassment. We take this very seriously.
- Cheat or troll. Play fairly and within the rules of the game. Don't cheat, grief, or exploit bugs and glitches. Don't promote or advertise known cheats, bugs, or exploits.
- Impersonate someone else. Pretending to be some other than yourself in order to deceive or defraud others should be reported. This includes other players or Daralet staff.
- Participate in or encourage illegal or dangerous activities. Doxing, swatting, sharing content that glorifies or incites violence, or other illegal activities will not be tolerated in the Daralet community. Threats of harm to others are taken seriously – don't do it, especially as a joke. If you see something that puts other players at risk, report them to the Daralet staff.
- Take advantage of fellow players. Don't do it. Scams or deceptive practices are prohibited, including seeking account information, buying or selling accounts and items, or personal information.
Code of Conduct Breaches
We take any breach of the Code of Conduct very seriously. We will take action against accounts that we determine to have breached our Code of Conduct and rules. These actions will increase in severity for each violation. Typically, the initial action is a verbal warning, followed by a 1 week mute, 1 month ban, 1 year ban, and permanent ban to the Daralet Discord and server. We reserve the right to skip any action depending on the severity of the Code of Conduct breach.
We are all a part of this community, and it is up to us to keep it friendly, fun, and free of negativity.
If you encounter a player not respecting the Code of Conduct, you can report them to the Daralet Admins and/or Envoys via a DM. We will take action against players we observe not following the Code of Conduct and escalate based upon the offense.
News & Patch Notes
What's changed recently on Daralet.
Community & Events
Where to find other players, get support, help keep the server running, and see what's happened at past community events.
Past events
Placeholder
Placeholder
Character
Every Isparian who answers the Call on Daralet arrives as one of three human heritages, then grows into a build defined by attributes and skills rather than a fixed class. Heritage is mostly about identity and lore — all paths of advancement stay open to everyone.
Playable heritages
Aluvian
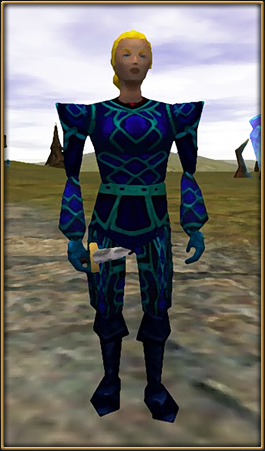
Pale-skinned wanderers with a natural inclination toward finesse weapons and quick reflexes. Culturally tied to the western holds of Dereth.
Sho
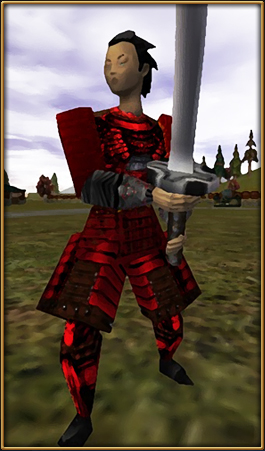
A disciplined, martial people with deep roots in unarmed and close combat traditions, and a strong sense of honor and order.
Gharu'ndim
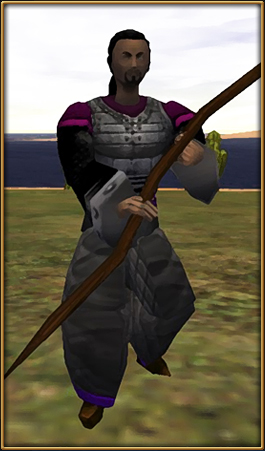
Desert-born and resilient, with an affinity for magic and a rich oral storytelling tradition.
Core attributes
| Attribute | Skills | Bonus Effects |
|---|---|---|
 Strength Strength |


|
Attack damage, Carry weight, Toughness |
 Endurance Endurance |


|
Toughness |
 Coordination Coordination |


|
Attack damage |
 Quickness Quickness |

|
Attack speed |
 Focus Focus |


|
|
 Self Self |


|
Spell damage, Spell restoration |
Skill categories
Most skills have received new attribute formulas. Attack skill formulas are now based on a single primary attribute, but attacks with those skills also gain a minor attack-skill bonus from a secondary attribute (+1% per 20 points). All skills receive a bonus effect when specialized. Credit costs below are listed as train / specialize.
Combat skills
Melee, ranged, and defensive skills. See the Combat page for the overhauled specifics.
Martial Weapons8 / 12
Helps you wield axes, maces, spears, and swords.
Formula: Strength ÷ 2 · Secondary: Coordination
Spec bonus:
- Attack Height bonuses increased to 20%.
- +5% crit chance when attacking with an axe.
- +50% crit damage when attacking with a mace.
- Consume 10% less stamina when attacking with a sword.
- +10% armor cleaving when attacking with a spear.
Dagger Aluvian bonus4 / 16
Helps you wield daggers, knives, jitte, and similar weapons.
Formula: Coordination ÷ 2 · Secondary: Quickness
Spec bonus:
- Attack Height bonuses increased to 20%.
- +5% crit chance when attacking with a dagger.
Staff Gharu'ndim bonus4 / 16
Helps you wield staves, swordstaves, and similar weapons.
Formula: Coordination ÷ 2 · Secondary: Strength
Spec bonus:
- Attack Height bonuses increased to 20%.
- +50% crit damage when attacking with a staff.
Unarmed Combat Sho bonus4 / 16
Helps you punch, kick, and wield punching weapons.
Formula: Coordination ÷ 2 · Secondary: Strength
Spec bonus:
- Attack Height bonuses increased to 20%.
- Consume 10% less stamina when attacking with a UA weapon.
Missile Weapons8 / 12
Helps you wield bows, crossbows, and atlatls.
Formula: Coordination ÷ 2 · Secondary: Strength
Spec bonus:
- Attack Height bonuses increased to 20%.
- +5% crit chance when attacking with a bow.
- +50% crit damage when attacking with an atlatl.
- +10% armor cleaving when attacking with a crossbow.
Thrown Weapons8 / 12
Helps you use weapons meant for throwing.
Formula: Strength ÷ 2 · Secondary: Coordination
Spec bonus:
- Attack Height bonuses increased to 20%.
- Lets you equip a small shield or buckler while wielding a thrown weapon.
Dual Wield4 / 4
Allows you to equip one-handed weapons in your off-hand slot and increases damage dealt with them.
Formula: Coordination ÷ 2
Spec bonus:
- Attack speed while dual-wielding increased by 25%.
Two-Handed Combat4 / 4
Allows you to equip two-handed weapons and increases damage dealt with them.
Formula: Strength ÷ 2
Spec bonus:
- Cleavers have a 50% chance to hit a 3rd enemy.
- +10% armor cleaving when attacking with a spear.
Shield4 / 4
Helps you wield shields.
Formula: (Strength + Endurance) ÷ 2
Spec bonus:
- Effective shield skill is doubled.
- Effective angle increased to 225 degrees.
Healing8 / 8
Helps you heal injuries.
Formula: (Coordination + Focus) ÷ 4
Spec bonus:
- Reduces healing kit cooldown by 2s.
- Healing Kit crit chance doubled (10% → 20%).
Physical Defense10 / 10
Helps you evade melee and missile attacks.
Formula: (Coordination + Quickness) ÷ 4
Spec bonus:
- Reduce melee/missile damage taken by 10% + 1% per 50 skill (max 20%).
- Shields with armor level have a 10–20% chance to fully block physical attacks.
Magic skills
Spellcasting schools and magical defenses.
War Magic8 / 12
Allows you to cast offensive war spells that arc and bolt.
Formula: Self ÷ 2 · Secondary: Focus
Spec bonus:
- Allows you to cast advanced War Magic spells (blasts, volleys, walls, rings).
- +5% crit chance when attacking with a scepter.
- +50% crit damage when attacking with a wand/baton.
- +10% ward cleaving when attacking with an orb.
- Doubles proc chance of weapons with cast-on-strike spells.
Life Magic8 / 12
Allows you to cast spells that heal and protect creatures.
Formula: Self ÷ 2
Spec bonus:
- Allows you to cast advanced Life Magic spells (life bolts and fellowship restoration spells).
- Allows you to cast some Void spells (Corrosion, Destructive Curse, Weakening Curse).
Mana Conversion4 / 4
Reduces the mana consumed by spells and magic items.
Formula: (Focus + Self) ÷ 4
Spec bonus:
- Mana saved through mana conversion is converted to health and stamina.
- Increased effectiveness of Mana Barrier: 1 mana consumed per damage instead of 2.
Arcane Lore4 / 4
Helps you use special magic items.
Formula: (Focus + Self) ÷ 2
Spec bonus:
- 50% of Arcane Lore is added to your weapon's Spellcraft, for all Spellcraft checks.
- Up to 25% chance to reduce mana cost of a proc spell by half. Chance and reduction amount scale with skill.
Magic Defense10 / 10
Helps you resist magic from spells and magic items.
Formula: (Focus + Self) ÷ 4
Spec bonus:
- Reduce magic damage taken by 10% + 1% per 50 skill (max 20%).
- Shields with aegis level have a 10–20% chance to fully block spells.
 Portal MagicFree
Allows the player to cast portal and recall spells. Use Town Attunement Devices to learn Portal Magic and rank up in skill. Speak with Portal Magic trainers in capital cities to learn a new spell at every 50 points of increased skill.
Utility skills
Supporting skills that shape how a character survives, moves, and interacts.
Perception6 / 6
Helps you discern the attributes/weaknesses of creatures, and helps you see traps and hidden objects.
Formula: Focus ÷ 2
Spec bonus:
- Chance to expose an armor/ward weakness when using the Expose Weakness ability.
- Reduced chance to receive sneak attacks.
- Up to 25% chance to prevent an incoming hit from being a critical strike.
Deception6 / 6
Helps prevent others from seeing your attributes/weaknesses and exposing vulnerabilities.
Formula: Focus ÷ 2
Spec bonus:
- Up to 50% chance to sneak attack from the front, scaling with skill.
Thievery8 / 8
Lets you analyze locks and pick them open, craft keys and other tools, and walk past enemies without being noticed.
Formula: (Coordination + Focus) ÷ 4
Spec bonus:
- Increased quality of loot found in locked chests.
- Position required to perform sneak attacks significantly increased.
Run0 / 4
Helps you run faster and jump further.
Formula: Quickness
Spec bonus:
- Combat mode run penalty is not applied.
- Increased effectiveness of Evasive Stance.
Jump0 / 2
Helps you jump higher and fall further without taking damage.
Formula: (Strength + Coordination) ÷ 2
Spec bonus:
- Fall damage reduced by 50%.
- Jump skill doubled for 10 seconds after performing a jump.
- Increased effectiveness of Evasive Stance.
 LoyaltyEarned
Trained by swearing allegiance to another player; affects your generated XP pass-up. No skill credits required. See the Social & Trade page for the full Rank system.
 LeadershipEarned
Trained when another player swears allegiance to you; affects your allegiance rank and received XP pass-up. No skill credits required. See the Social & Trade page for the full Rank system.
Trade skills
Crafting disciplines, learned from trainer NPCs rather than skill credits. See the Crafting page for the overhauled specifics.
 BlacksmithingTrainer
Use salvaged metals to improve heavy armor and melee weapons.
 TailoringTrainer
Use salvaged cloth and leather to improve cloth and light armors.
 WoodworkingTrainer
Use salvaged wood to improve bows, crossbows, and atlatls. Fletch arrows, bolts, and darts.
 SpellcraftingTrainer
Use salvaged gems to improve wands and other spellcasters. Scribe spell scrolls.
 JewelcraftingTrainer
Use salvaged gems to improve jewelry. Carve gems into powerful jewels, then socket them into weapons, armor, and jewelry for special effects.
 CookingTrainer
Prepare meats for buffs at a campfire, rest at a campfire (yours or another player's) for a temporary XP buff, and perform other cooking crafts.
 AlchemyTrainer
Concoct health, stamina, and mana potions, perform quest-related crafts, and prepare dyes from plants.
Combat
Daralet runs an overhauled combat system, rebalanced from the original game for a more responsive, modern feel.
What's changed
Combat has been rebalanced from the ground up: skill formulas, attack height bonuses, defense (evades/blocks), threat, stealth, the magic system, and a new Combat Focus / advanced ability layer on top of the base skills. See the Character page for per-skill formulas and specialization bonuses.
Vitals & resources
Vitals regeneration is based on a % of your maximum of that vital, with diminishing returns as a player's max vital increases.
| Vital | Regen rate |
|---|---|
| Health | 5% per 5 seconds |
| Stamina | 10% per 5 seconds |
| Mana | 10% per 5 seconds |
Power / Accuracy bar
Power/Accuracy bars give large combat bonuses when set to a high setting, but cost much more stamina. The base stamina cost is determined by the tier and speed of the weapon used — high power/accuracy attacks can only be used sparingly.
- Min power = -50% damage.
- Max power = roughly +100% damage (scales with weapon animation length).
- Equipment with cast-on-strike spells have scaled proc chances depending on power/accuracy bar setting (double chance at full power/accuracy).
Attack height bonuses
Different bonuses are granted for each attack height. Bonuses are increased to +20% if the weapon skill is specialized.
| Height | Bonus |
|---|---|
| High | +10% damage |
| Medium | +10% attack skill |
| Low | +10% physical defense skill |
Defense
Evades
Defenses can no longer allow you to evade or resist all enemy attacks. On a successful evade/resist roll, there's an equal chance the result becomes a full evade, a glancing blow, or no evade.
- Full evade = no damage taken.
- Glancing blow = 50% damage taken (some items/abilities may alter this amount).
- No evade = full damage taken.
Blocks
Players with a specialized defense skill and an equipped shield have a chance to fully block an attack or spell. Block chance ranges from 10%–20%, depending on the shield's armor/ward level and the enemy's attack skill.
Melee swarm damage reduction
Players with a melee weapon equipped gain a damage reduction bonus when more than one enemy is in melee range — 10% damage reduction multiplicatively, per nearby enemy beyond the first.
Swarm reduction by enemy count
| Enemies | Damage reduction |
|---|---|
| 2 | 10% |
| 3 | 19% |
| 4 | 27% |
| 5 | 34% |
| 6 | 41% |
| 7 | 47% |
| 8 | 52% |
| ... | ... |
Combat mode penalties
Run skill is reduced by 50%.
Peace mode penalties
- Cannot evade.
- Cannot block.
- Always receive critical hits.
Healing kits
- Healing kits never fail, but have an increased stamina cost and a reworked heal-amount formula.
- Stamina and Mana kits have been added, with 30s shared cooldowns.
- All kit types provide a restoration-over-time effect when used.
Threat & stealth
Threat
Monsters decide who to attack based on which enemy they determine to be the highest threat. Various actions during combat affect a player's threat level.
Ways to increase threat
- Engage: entering a monster's aggro range adds a player to its threat list with an initial amount of threat.
- Damage: dealing damage to a monster increases a player's threat level.
- Local Support: casting support spells and healing players increases threat toward nearby monsters.
- Combat Ability (Provoke): increases threat gains of damage/support actions by 20%.
- Sigil Trinket (Compass of Aggression): Chance to apply double threat on attacks of at least 50% power.
Ways to decrease threat
- Over time: threat level decreases by several points per second.
- Combat Ability (Smokescreen): reduces threat gains of damage/support actions by 20%.
- Sigil Trinket (Goggles of Avoidance): Chance to apply no threat on attacks of at least 50% power.
Stealth
A Stealth ability toggle can be used to attempt to hide from nearby enemies. Requires a skill check using the player's Thievery skill vs. the enemy's Perception skill.
Magic system
School & spell changes
- Creature Magic and Item Magic have been removed as player-castable schools.
- New skill, Portal Magic, allows casting portal and recall spells — see the Character page.
- Life Magic: Protection, Vuln, and Regeneration spells removed as player-castable (accessible through Sigil Scarabs instead). Restoration spells can now crit. Vuln spells increase damage by 21–27% based on spell level; Prot spells increase damage resistance by 25% at every level, with higher levels extending buff/debuff duration. Specializing grants access to Fellowship spells and some Void spells.
- War Magic: damage scales with Self instead of the War skill, using a formula similar to melee/missile scaling. Blasts and Volleys now have level 1 and 2 versions. Blasts aim toward additional nearby enemies instead of firing at fixed angles. Volleys can now pierce and strike up to 3 additional targets.
- Durations: all buffs last 10s + 1s per spell level. All debuffs last 10s + 2s per spell level (reducible by the target's Ward Level).
Mana Conversion
- Maximum mana cost reduction from Mana Conversion is 50%; minimum reduction is half of a character's current max.
Arcane Lore
- Arcane Lore activation requirements are generally much higher, scaling with an item's tier, spell count, and spell levels — items only carry an activation requirement once they have more than 1 spell per wield-slot (or a proc spell). This effectively requires at least 100 innate points in Focus and/or Self to use gear with more than 1 spell per slot at your tier. Quest items may ignore this rule.
Proc spells
Cast-on-strike spells can appear on weapons.
- Proc spells use the wielder's magic skill plus 10% of the weapon's Spellcraft (or half of Lore skill added to Spellcraft, if Arcane Lore is specialized).
- Proc spells gain a damage multiplier equal to 1% of the weapon's Spellcraft (300 Spellcraft = x3 damage).
Sigil Scarabs provide access to some spells that are no longer player-castable directly — see the full Sigil Trinkets catalog on the Items page.
Combat Foci
A new item type equippable in the trinket slot. Each Combat Focus comes with a set of creature buffs themed around one of six template classes, obtainable from an NPC in the academy dungeons and starter towns. Players can swap out one attribute and three skills on each Combat Focus they possess.
 Warrior
Attributes: Strength, Endurance
Skills: Martial Weapons, Shield, Physical Defense, Thrown Weapons, Healing, Perception
 Blademaster
Attributes: Endurance, Coordination
Skills: Martial Weapons, Dual Wield, Two-Handed Combat, Physical Defense, Healing, Run
 Archer
Attributes: Coordination, Quickness
Skills: Missile Weapons, Dagger, Staff, Unarmed Combat, Physical Defense, Healing, Perception, Run
 Vagabond
Attributes: Quickness, Focus
Skills: Dagger, Staff, Unarmed Combat, Dual Wield, Magic Defense, Perception, Deception, Thievery
 Sorcerer
Attributes: Focus, Self
Skills: War Magic, Life Magic, Mana Conversion, Arcane Lore, Deception, Magic Defense
 Spellsword
Attributes: Self, Strength
Skills: Martial Weapons, Two-Handed Combat, Arcane Lore, War Magic, Life Magic, Magic Defense
Advanced combat abilities
Combat masters residing around Osteth teach players advanced abilities — 18 in total, with each base Combat Focus having access to 7 of them. Exact effects are still being finalized.
 Phalanx
Academy Vendor
Phalanx
Academy Vendor
Use this item to move into a defensive stance, and use again to lower your guard. While active, you can block and parry attacks of all angles, you have up to 50% chance to convert full hits you receive into partial hits, and up to 50% chance to convert partial hits into blocks.
Chance per shield type:
- Covenant: 50%
- Tower: 45%
- Large: 40%
- Standard: 35%
- Small/Buckler: 30%
- Two-Handed Weapon: 25%
- Cooldown
- 20 seconds.
- Cost
- Your attacks cost 25% more stamina and mana while Phalanx is active.
 Provoke
Glenden Wood
Provoke
Glenden Wood
Activate to instantly increase your threat towards nearby enemies substantially. While active, you take 15% less damage and attacks of at least 50% power produce double threat from damage against your targets.
- Cooldown
- 20 seconds.
- Cost
- Your attacks consume 25% more stamina and mana while Provoke is active.
 Riposte
Arwic
Riposte
Arwic
Use to have a 100% increased chance to parry and block incoming attacks for 10 seconds. You follow up parried and blocked attacks against your current target with a riposte if the enemy is in close range.
- Cooldown
- 20 seconds.
- Cost
- Your attacks cost 25% more stamina and mana while Riposte is active.
 Weapon Master
Academy Vendor
Weapon Master
Academy Vendor
Use to gain a different effect depending on the weapon type you're wielding.
- Axe/Dagger: Your next attack of at least 50% power causes your target to bleed over 20 seconds.
- Mace/Staff/Club: Your next attack of at least 50% power dazes your target, lowering their attack skill, for 20 seconds.
- Unarmed/Shouken: Your next attack of at least 50% power unbalances your target, lowering their defense, for 20 seconds.
- Spear/Javelin/Dart: Your attacks strike enemies within a frontal cone and can hit enemies behind your target, for 10 seconds.
- Sword: Your attacks are 25% faster, for 10 seconds.
- Cooldown
- 20 seconds.
- Cost
- Your attacks cost 25% more stamina while Weapon Master is active.
 Relentless
Arwic
Relentless
Arwic
Use to move into a Relentless stance, producing adrenaline from low power attacks. Stamina regeneration is increased by up to 100% and damage dealt is reduced by up to 10%, depending on your adrenaline level while Relentless is active. Use again while in Relentless stance to activate Tenacity. Tenacity reduces the cost of your attacks by up to 100%, depending on your adrenaline level, for 10 seconds. If used while Fury stance is active, Fury will deactivate and Relentless will activate, and half of adrenaline will be lost.
- Cooldown
- 20 seconds.
 Fury
Glenden Wood
Fury
Glenden Wood
Use to move into a Fury stance, producing adrenaline from high power attacks. Damage dealt is increased by up to 25% and you have a chance to injure yourself while attacking, depending on your adrenaline level while Fury is active. Use again while in Fury stance to activate Enrage. Enrage increases damage dealt from your attacks by up to 100%, depending on your adrenaline level, for 10 seconds. If used while Relentless stance is active, Relentless will deactivate and Fury will activate, and half of ardenaline will be lost.
- Cooldown
- 20 seconds.
- Cost
- Your attacks cost 25% more stamina and mana while Fury is active.
 Multishot
Academy Vendor
Multishot
Academy Vendor
Use to fire up to three projectiles at different targets when attacking with at least 50% accuracy, for 10 seconds.
- Cooldown
- 20 seconds.
- Cost
- Your attacks cost 25% more stamina and mana while Multishot is active.
 Steady Strike
Tou-tou
Steady Strike
Tou-tou
Use to gain 25% attack skill and 25% damage but 10% reduced attack speed, for 10 seconds.
- Cooldown
- 20 seconds.
- Cost
- Your attacks cost 25% more stamina and mana while Steady Shot is active.
 Evasive Stance
Sawato
Evasive Stance
Sawato
Use this item to move into an evasive stance, and use again to drop from the stance. While active, your chances to evade and resist attacks are Lucky.
- Cooldown
- 20 seconds. Only triggers if you drop out of Evasive Stance from running out of stamina.
- Cost
- Stamina costs of your attacks are increased, scaling against your Run or Jump skill. If Run or Jump is specialized, the lowest possible stamina penalty is +25%, otherwise it is +50%.
 Vanish
Academy Vendor
Vanish
Academy Vendor
Use this item to attempt to vanish from sight. If you succeed, for the next five seconds no enemies can target you or break your stealth.
- Skill Check
- Thievery vs Perception, for each nearby enemy that is focused on you. Enemies you succeed against will lose focus of you. You must succeed against all enemies to move into stealth.
- Cooldown
- 30 seconds.
- Cost
- Stamina, equal to the average enemy level + 1/10th of each enemy level.
 Backstab
Tufa
Backstab
Tufa
Use to increase sneak attack damage by 25% (additively) while within a moderate distance from your target, for 10 seconds. If you are attacking from stealth, your attack deals x2 to x3 damage, depending on how close you are to your target.
- Cooldown
- 20 seconds.
- Cost
- Your attacks cost 25% more stamina and mana while Backstab is active.
 Smokescreen
Tou-tou
Smokescreen
Tou-tou
Activate to instantly decrease your threat towards nearby enemies substantially. While active, you have 10% increased evade chance and attacks of at least 50% power produce half threat from damage against your targets.
- Cooldown
- 20 seconds.
- Cost
- Your attacks cost 25% more stamina and mana while Smokescreen is active.
 Overload
Academy Vendor
Overload
Academy Vendor
Use to move into an Overload stance, infusing extra mana into your spells, producing mana charge. Spell effectiveness is increased by up to 25% and mana costs are increased by up to 100%, depending on your mana charge level. Use again while in Overload stance to activate Overload Discharge. Overload Discharge increases spell effectiveness by up to 100%, for 10 seconds. If used while Battery stance is active, Battery will deactivate and Overload will activate, and half of mana charge will be lost.
- Cooldown
- 20 seconds.
- Cost
- Your attacks cost 25% more stamina and mana while Overload is active.
 Mana Barrier
Tufa
Mana Barrier
Tufa
Use this item to shield yourself with mana, and use again to lower the shield. While active, 25% of incoming damage is lost as mana instead.
- Cooldown
- 20 seconds. Only triggers if Mana Barrier is broken from running out of mana.
- Cost
- The amount of mana lost scales with Mana Conversion skill. If Mana Conversion is specialized, the lowest possible mana penalty is +25%, otherwise it is +50%.
 Battery
Sawato
Battery
Sawato
Use to move into an Battery stance, siphoning mana from your spells, producing mana charge. Mana costs are reduced by up to 50% and spell effectiveness is reduced by up to 10%, depending on your mana charge level. Use again while in Battery stance to activate Battery Discharge. Battery Discharge reduces mana cost by up to 100%, for 10 seconds. If used while Overload stance is active, Overload will deactivate and Battery will activate, and half of mana charge will be lost.
 Enchanted Blade
Academy Vendor
Enchanted Blade
Academy Vendor
Use this ability to power up your equipped melee weapon, unleashing a spell on your next attacked target. The chosen spell will either be War Bolt or Heal Self, depending on the school of your weapon's cast-on-strike spell. If your weapon does not have a cast-on-strike spell, or if the wielder does not have the associated magic skill trained, Enchanted Blade will do nothing. The spell level is determined by your magic skill and your equipped weapon's spellcraft.
- Cooldown
- 10 seconds.
- Cost
- Mana cost is equal to double the cost of the spell.
 Aegis
Al-Arqas
Aegis
Al-Arqas
Use to cast a protection spell on yourself based on the element of the last damage you received, for 10 seconds. The potency of the spell depends on your weapon's spellcraft.
- Cooldown
- 20 seconds.
- Cost
- Your attacks cost 25% more stamina and mana while Aegis is active.
 Reflect
Al-Arqas
Reflect
Al-Arqas
Use to increase your effective magic defense by 50%, for 10 seconds. While active, if you resist or partially resist a projectile spell, it is reflected back to the caster. If you have Magic Defense specialized, you automatically reflect the first spell that hits you, regardless of if you resisted it or not.
- Cooldown
- 20 seconds.
- Cost
- Your attacks cost 25% more stamina and mana while Reflect is active.
Other activated abilities
 Expose Physical Weakness
Academy Vendor
Expose Physical Weakness
Academy Vendor
Attempt to expose a physical weakness in a targeted enemy. Requires a Perception vs. Deception check. Costs 10 stamina × enemy tier; 15s cooldown, shared with Expose Magical Weakness.
 Expose Magical Weakness
Academy Vendor
Expose Magical Weakness
Academy Vendor
Attempt to expose a magical weakness in a targeted enemy. Requires a Perception vs. Deception check. Costs 10 stamina × enemy tier; 15s cooldown, shared with Expose Physical Weakness.
 Stealth
Academy Vendor
Stealth
Academy Vendor
See Threat & Stealth above.
 Slash/Thrust Toggle
Academy Vendor
Slash/Thrust Toggle
Academy Vendor
Switch between thrusting and slashing attacks, if your weapon supports it.
Crafting
Daralet runs an overhauled crafting system.
Overview
Crafting skills don't require skill credits to train. Instead, each player character can learn up to two crafting skills by speaking with the respective skill masters.
Crafting disciplines
Alchemy
- Use your alchemy table to concoct new health, stamina, and mana potions.
- Perform various quest-related crafts.
- Prepare dyes from plants.
Taught by Meng Zi, the Sage in Hebian-To.
Blacksmithing
- Use salvaged metals to improve heavy armor and melee weapons.
- Use salvaged gems to imbue heavy armor and melee weapons with powerful new properties — see the Tinkering Calculator.
Taught by Chen, the Tinker in Hebian-To.
Cooking
- Use your campfire to prepare various meats, providing new buffs.
- Rest at your (or another player's) campfire to gain a temporary XP buff.
- Perform various cooking crafts.
- Apply dyes to armor/clothing.
Taught by Chef Martel in Cragstone.
Jewelcrafting
- Use salvaged gems to improve jewelry.
- Use your Intricate Carving Tool on lootgen gems to carve them into powerful jewels.
- Socket jewels into weapons and jewelry for powerful new effects.
Taught by Al-Hasan ibn Sulaiman in Zaikhal.
Spellcrafting
- Use salvaged gems to improve wands and other spell casters.
- Scribe spell scrolls.
- Use salvaged gems to imbue wands and other spell casters with powerful new properties — see the Tinkering Calculator.
Taught by Landrew, the Dabbler in Cragstone.
Tailoring
- Use salvaged cloth and leather to improve cloth and light armors.
- Use salvaged gems to imbue cloth and light armors with powerful new properties — see the Tinkering Calculator.
Taught by Almira bint Qan-ra in Zaikhal.
Woodworking
- Use salvaged wood to improve bows, crossbows, and atlatls.
- Fletch arrows, bolts, and darts.
- Use salvaged gems to imbue bows, crossbows, and atlatls with powerful new properties — see the Tinkering Calculator.
Taught by William Fletcher in Cragstone.
Salvage
Tinkering and imbuing are fueled by salvage, bags of material (metal, cloth, wood, hide, or gems) obtained by salvaging items. Each bag has its own Workmanship rating and stacks up to 1000 units per bag.
- Gaining salvage: Salvaging an item yields 1 + half its Workmanship in units of that material, with a 50% chance at one extra unit if the item's Workmanship is odd. A Workmanship 6 item nets 4 units; a Workmanship 7 item nets 4 or 5. Higher-Workmanship items produce more salvage, and that salvage carries the same Workmanship as the item it came from.
- You don't need a full bag per tink. Each tinkering or imbuing attempt only consumes an amount of salvage equal to the target item's Workmanship (scaled up by armor slots for armor) — not a full 100-unit bag. See the Tinkering Calculator for exact costs. A single bag can cover many attempts.
- Combining bags: Use one salvage bag on another bag of the same material and Workmanship to merge them into a single bag, up to the 1000-unit cap.
 Salvage Crate: If you're carrying a Salvage Crate pack, salvage produced from salvaging items is sorted directly into it instead of your main inventory — see Social & Trade for the full list of specialty packs.
- Workmanship is unique per bag. Salvage of the same material but different Workmanship never merges — a Workmanship 3 Iron bag and a Workmanship 6 Iron bag cannot be combined. However, salvage can be Refined, increasing its workmanship at the cost of some units (see below).
Refining salvage
Salvage can be refined one Workmanship tier higher (+1) at a time, consuming units of the lower-Workmanship bag to produce units of the higher one. The cost is X units of the lower bag per unit gained, where X is the Workmanship of the bag you're refining into.
Worked example
Refining Workmanship 3 Iron into Workmanship 4 Iron costs 4 units of Workmanship 3 Iron for every 1 unit of Workmanship 4 Iron produced (X = 4, the target's Workmanship). Refining 100 units of Workmanship 3 Iron this way yields 25 units of Workmanship 4 Iron.
All salvage types
Blacksmithing (metals)
-

 Brass
BrassMelee: +1% Physical Defense modifier.
Heavy Armor: +0.25% Physical Defense & Shield modifier per armor slot.
-
 Bronze
Melee: +5% Damage, +0.5% Physical Defense modifier.
Heavy Armor: +5% Armor, +0.125% Physical Defense & Shield modifier per armor slot.
-
 Copper
Melee: +1% Attack modifier.
Heavy Armor: +0.25% Attack & Two-Handed Combat modifier per armor slot.
-
 Gold
GoldMelee: +5% Damage, +0.5% Attack modifier.
Heavy Armor: +5% Armor, +0.125% Attack & Two-Handed Combat modifier per armor slot.
-
 Iron
IronMelee: +7.5% Damage, but +5 Speed.
Heavy Armor: +7.5% Armor, but +0.25% Resource Penalty per armor slot.
-
 Pyreal
Melee: +5% Damage, +0.5% Magic Defense modifier.
Heavy Armor: +5% Armor, +2 Ward Level.
-
 Silver
Melee: +1% Magic Defense modifier.
Heavy Armor: +3 Ward Level, +0.25% Health Regeneration modifier per armor slot.
-
 Steel
SteelMelee: +0.5% Attack & Physical Defense modifier.
Heavy Armor: +5% Armor, +0.25% Health Regeneration modifier per armor slot.
Tailoring (cloth & leather)
-

 Leather
+7.5% Armor.
-
 Armoredillo Hide
+10% Armor, but +0.25% Resource Penalty per armor slot.
-
 Gromnie Hide
Cloth: +5% Armor, +0.25% Mana Regeneration modifier per slot.
Leather: +5% Armor, +0.25% Stamina Regeneration modifier per slot.
-
 Reedshark Hide
Cloth: +5% Armor, +0.125% War Magic modifier per slot.
Leather: +5% Armor, +0.125% Attack & Dual-Wield modifier per slot.
-

 Linen
Linen+5% Armor, -0.25% Resource Penalty per armor slot.
-
 Satin
SatinCloth: +0.25% Life Magic, Perception & Mana Regeneration modifier per slot.
Leather: +5% Armor, +0.25% Thievery & Deception modifier per slot.
-
 Silk
Silk+5% Armor, +0.25% Perception & Deception modifier per slot.
-
 Velvet
Cloth: +0.25% War Magic, Life Magic & Deception modifier per slot.
Leather: +0.25% Attack, Dual-Wield & Perception modifier per slot.
-
 Wool
WoolCloth: +0.25% Mana & Mana Regeneration modifier per slot.
Leather: +0.25% Stamina & Stamina Regeneration modifier per slot.
Woodworking (woods)
-

 Ebony
Ebony+1% Magic Defense modifier.
-
 Mahogany
+7.5% Damage modifier.
-
 Oak
Oak+1% Physical Defense modifier.
-
 Pine
Pine+1% Attack modifier.
-
 Teak
Teak+0.5% Attack & Physical Defense modifier.
Spellcrafting (gems)
-

 Green Garnet
+7.5% Elemental Damage modifier.
-
 Opal
Opal+7.5% Elemental Damage modifier, +5% Mana Conversion modifier.
-
 Malachite
+1% Physical Defense modifier.
-
 Amethyst
+1% Magic Defense modifier.
-
 Lavender Jade
+7.5% Restoration modifier.
-
 Rose Quartz
+5% Restoration modifier, +5% Mana Conversion modifier.
Jewelcrafting
-

 Moonstone
+250 Max Mana (only if the item already has a Max Mana stat).
-
 White Jade
+1 Ward Level.
Imbue gems
Imbuing works through whichever discipline governs the target item, doesn't consume a tink attempt, and is limited to 1 imbue per item, ever. Imbued gear becomes attuned to the first character that equips it.
-

 Aquamarine
Cold Rending: +15-30% cold damage, based on weapon skill. Doesn't stack with Vulnerability spells.
-
 Black Garnet
Pierce Rending: +15-30% pierce damage, based on weapon skill. Doesn't stack with Vulnerability spells.
-
 Emerald
Acid Rending: +15-30% acid damage, based on weapon skill. Doesn't stack with Vulnerability spells.
-
 Imperial Topaz
Slash Rending: +15-30% slash damage, based on weapon skill. Doesn't stack with Vulnerability spells.
-
 Jet
JetElectric Rending: +15-30% electric damage, based on weapon skill. Doesn't stack with Vulnerability spells.
-
 Red Garnet
Fire Rending: +15-30% fire damage, based on weapon skill. Doesn't stack with Vulnerability spells.
-
 White Sapphire
Bludgeon Rending: +15-30% bludgeon damage, based on weapon skill. Doesn't stack with Vulnerability spells.
-
 Black Opal
Weapon/Caster: Critical Strike, +5-10% critical chance.
Armor: Critical Resistance, reduces the chance of being critically hit.
-
 Fire Opal
Weapon/Caster: Crippling Blow, +50-100% critical damage.
Armor: Critical Damage Resistance, reduces critical damage taken.
-
 Sunstone
Weapon/Caster: Armor Rending, ignores 10-20% armor.
Armor: Armor Tempering, reduces physical damage taken.
-
 Tourmaline
Weapon/Caster: Ward Rending, ignores 10-20% ward.
Armor: Ward Tempering, reduces magical damage taken.
Jewels and Sockets
Jewelcrafters can carve lootgen gems into jewels, which can be placed in weapons, armor, and jewelry sockets for a special effect.
Sockets
Weapons, armor, and jewelry have a chance to generate with sockets. Up to a max of one socket per item slot. (two for 2h weapons and missile launchers)
- Salvaging gear with sockets generates Bezel Fragments.
- Players can use a Bezel Tool to add a socket to an item, if they have enough Bezel Fragments in their bag. (Required # of Fragments = Target Item Tier x Target Item Tier)
Jewels
Jewels can be placed in sockets to provide powerful effects.
- Carve a jewel by using an Intricate Carving Tool on a lootgen gem. Jewelcrafting skill determines success rate and can produce jewels of different quality levels.
- Use the jewel and target an item with a socket to add the jewel. There is no skill check for this step and any player can do it.
- To remove a jewel, use an Intricate Carving Tool on the socketed item. There is no skill check for this step and any player can do it.
- Each jewel's listed effect is a flat base amount plus a small bonus that scales with Quality. Socketing more than one jewel of the same type only stacks that Quality bonus, not the base amount, so extra copies of the same jewel give diminishing returns.
Jewel Types
A jewel's Quality (1-10, Scuffed to Flawless) is set when it's carved and scales its effect — higher Jewelcrafting skill relative to the base gem's workmanship produces higher-Quality jewels. Some jewels have a second, alternate effect that applies instead when socketed into armor rather than their usual slot.
Necklace jewels
-

 Sunstone
Illuminated Mind: +5% increased experience from monster kills (+0.25% per jewel Quality).
-
 Sapphire
Seeker: +5% bonus to loot quality from monster kills (+0.25% per jewel Quality).
-
 Green Jade
Prosperity: +5% chance for an extra item drop from monster kills (+0.25% per jewel Quality).
Ring jewels
Once socketed, a ring is restricted to whichever hand its jewel calls for.
-
 Carnelian
Right hand only: Mighty Thews, +10 Strength (+1 per jewel Quality).
-
 Azurite
Right hand only: Erudite Mind, +10 Self (+1 per jewel Quality).
-
 Tiger Eye
Right hand only: Dexterous Hand, +10 Coordination (+1 per jewel Quality).
-
 Red Jade
Left hand only: Focused Mind, +10 Focus (+1 per jewel Quality).
-
 Yellow Topaz
Left hand only: Perseverance, +10 Endurance (+1 per jewel Quality).
-
 Peridot
Left hand only: Swift-footed, +10 Quickness (+1 per jewel Quality).
Bracelet jewels
Once socketed, a bracelet is restricted to whichever wrist its jewel calls for.
-
 Agate
AgateLeft wrist only: Provocation, +10% increased threat generated by your actions (+0.5% per jewel Quality).
-
 Smokey Quartz
Left wrist only: Clouded Vision, +10% reduced threat generated by your actions (+0.5% per jewel Quality).
-
 Moonstone
Left wrist only: Meticulous Magus, +20% reduced mana consumed by items (+1% per jewel Quality).
-
 Malachite
Left wrist only: Thrifty Scholar, +20% reduced chance to burn spell components (+1% per jewel Quality).
-
 Onyx
OnyxRight wrist only: Black Bulwark, +10% reduced damage taken from Slash, Pierce, and Bludgeon (+0.5% per jewel Quality).
-
 Zircon
Right wrist only: Prismatic Ward, +10% reduced damage taken from Acid, Fire, Cold, and Electric (+0.5% per jewel Quality).
-
 Diamond
Right wrist only: Hardened Fortification, up to +20% reduced physical damage taken, building from 0% based on how recently you've been hit by a physical attack (+1% per jewel Quality).
-
 Amethyst
Right wrist only: Nullification, up to +20% reduced magic damage taken, building from 0% based on how recently you've been hit by a damaging spell (+1% per jewel Quality).
Shield jewels
-
 Turquoise
Stalwart Defense: +10% increased block chance (+0.5% per jewel Quality).
-
 White Quartz
Swift Retribution: deflect 10% of a blocked attack's damage back onto a close-range attacker (+0.5% per jewel Quality).
-
 Yellow Garnet
Bravado: up to +20% increased physical attack skill, building from 0% based on how often you've recently hit the target (+1% per jewel Quality).
-
 Fire Opal
Familiar Foe: up to +20% increased evade and resist chance against the target you're attacking, building from 0% based on how often you've recently hit it (+1% per jewel Quality).
-
 Black Opal
Vicious Reprisal: +5% chance to evade a critical attack; your next attack after evading is a guaranteed critical (+0.25% per jewel Quality).
Armor jewels
Aquamarine, Black Garnet, Emerald, Imperial Topaz, Jet, Red Garnet, White Sapphire, Lapis Lazuli, and Amber can also be socketed into a weapon instead, for a different effect — see Weapon jewels. Diamond and Amethyst can also be socketed into a bracelet instead, for a different effect — see Bracelet jewels.
-
 Aquamarine
Gelidite's Bane, +20 Frost Protection, capped at a protection rating of 1.2 (Above Average) (+1 per jewel Quality).
-
 Black Garnet
Archer's Bane, +20 Piercing Protection, capped at a protection rating of 1.2 (Above Average) (+1 per jewel Quality).
-
 Emerald
Olthoi's Bane, +20 Acid Protection, capped at a protection rating of 1.2 (Above Average) (+1 per jewel Quality).
-
 Imperial Topaz
Swordsman's Bane, +20 Slashing Protection, capped at a protection rating of 1.2 (Above Average) (+1 per jewel Quality).
-
 Jet
JetAstyrrian's Bane, +20 Lightning Protection, capped at a protection rating of 1.2 (Above Average) (+1 per jewel Quality).
-
 Red Garnet
Inferno's Bane, +20 Flame Protection, capped at a protection rating of 1.2 (Above Average) (+1 per jewel Quality).
-
 White Sapphire
Tusker's Bane, +20 Bludgeoning Protection, capped at a protection rating of 1.2 (Above Average) (+1 per jewel Quality).
-
 Lapis Lazuli
Austere Anchorite, chance on taking damage to gain an equal amount as mana (+0.5% per jewel Quality).
-
 Amber
AmberMasochist, chance on taking damage to gain an equal amount as stamina (+0.5% per jewel Quality).
-
Diamond
Toughness, +20 Physical Defense (+1 per jewel Quality).
-
Amethyst
Resistance, +20 Magic Defense (+1 per jewel Quality).
Weapon jewels (melee, missile & wands)
The game's "weapon" slot covers melee weapons, missile weapons, and wands alike, so every jewel below can be socketed into any of the three. Aquamarine, Black Garnet, Emerald, Imperial Topaz, Jet, Red Garnet, White Sapphire, Lapis Lazuli, and Amber can also be socketed into armor instead, for a different effect — see Armor jewels.
-
 Hematite
Blood Frenzy: +10% increased damage on all attacks, but 10% of those attacks also deal the bonus damage to yourself (+0.5% per jewel Quality).
-
 Bloodstone
Sanguine Thirst: 10% chance on hit to heal for 10% of the damage dealt (+0.5% per jewel Quality).
-
 Citrine
Vigor Siphon: 10% chance on hit to restore stamina equal to 10% of the damage dealt (+0.5% per jewel Quality).
-
 Opal
OpalOphidian: 10% chance on hit to restore mana equal to 10% of the damage dealt (+0.5% per jewel Quality).
-
 White Jade
Purified Soul: +10% bonus to your restoration spells, plus a 2% chance to create a healing sphere on your target when casting one (+0.5% / +0.1% per jewel Quality).
-
 Rose Quartz
Tilted-scales: +20% bonus to your transfer spells, offset by an equal reduction to your other restoration spells (+1% per jewel Quality).
-
 Ruby
RubyRed Fury: up to +20% increased damage as your health approaches 0 (+1% per jewel Quality).
-
Aquamarine
Bone-chiller, +10% cold damage, plus a 2% chance to surround your target with a chilling mist (+0.5% / +0.1% per jewel Quality).
-
Black Garnet
Precision Strikes, up to +20% piercing resistance penetration, building from 0% based on how often you've recently hit the target (+1% per jewel Quality).
-
Emerald
Devouring Mist, +10% acid damage, plus a 2% chance to surround your target with an acidic mist (+0.5% / +0.1% per jewel Quality).
-
Imperial Topaz
Falcon's Gyre, +10% chance to cleave an additional target (+0.5% per jewel Quality).
-
Jet
Astyrrian Rage, +10% electric damage, plus a 2% chance to electrify the ground beneath your target (+0.5% / +0.1% per jewel Quality).
-
Red Garnet
Blazing Brand, +10% fire damage, plus a 2% chance to set the ground beneath your target ablaze (+0.5% / +0.1% per jewel Quality).
-
White Sapphire
Skull-cracker, +10% bludgeoning critical damage, building based on how often you've recently hit the target (+0.5% per jewel Quality).
-
Lapis Lazuli
Blue Fury, up to +20% increased damage as your mana approaches 0 (+1% per jewel Quality).
-
Amber
Yellow Fury, up to +20% increased damage as your stamina approaches 0 (+1% per jewel Quality).
-
Yellow Garnet
Bravado: up to +20% increased physical attack skill, building from 0% based on how often you've recently hit the target (+1% per jewel Quality).
-
Fire Opal
Familiar Foe: up to +20% increased evade and resist chance against the target you're attacking, building from 0% based on how often you've recently hit it (+1% per jewel Quality).
-
Black Opal
Vicious Reprisal: +5% chance to evade a critical attack; your next attack after evading is a guaranteed critical (+0.25% per jewel Quality).
Wand-only jewels
Unlike the Weapon jewels above, these three can only be socketed into wands — not melee or missile weapons.
-
 Green Garnet
Elementalist: up to +20% increased War Magic damage, building from 0% based on how often you've recently hit the target (+1% per jewel Quality).
-
 Tourmaline
Ruthless Discernment: up to +20% ward cleaving, building from 0% based on how often you've recently hit the target (+1% per jewel Quality).
-
 Lavender Jade
Selfless Spirit: +10% bonus to your restoration spells cast on others, offset by an equal reduction when cast on yourself (+0.5% per jewel Quality).
Crafting XP
Crafting skills can't be leveled with unassigned XP. Instead, performing crafts with each skill grants XP directly toward its next rank. To receive XP for a craft, a player's skill must be no greater than 50 points above the difficulty of the crafting recipe.
The formula for XP received is:
AwardedXp = CostOfCurrentRank × ProgressMod × DifficultyMod × ArmorSlots
- Cost of current rank — the total cost to level up your current crafting skill to the next rank.
- Progress mod — a value from 0.5 to 0.01, depending on how close your crafting skill level is to 200.
- Difficulty mod — a value from 0.0 to 2.0, depending on the relative difficulty of the recipe: 0.0 for a craft at least 50 less difficulty than your current skill, up to 2.0 for a craft at least 50 more difficult than your current skill.
- Armor slots — the number of armor slots your target item contains. Defaults to 1.0 for all crafts that don't target armor.
Social & Trade
A large emphasis has been placed on the three capital towns to provide hubs for social, trade, and travel benefits.
Capital towns
Each heritage's capital town is the social and economic center of that community. Every town contains a portal to its heritage's capital, each capital contains portals to all towns of the same heritage as well as the other capitals, and starter towns are portalled to each other and their own capital. See the World page for the full portal network layout.
Marketplace
An asynchronous trade market centered in Hebian-To, entirely within the client UI — players can list items for sale and purchase from other players' listings without both parties needing to be online at the same time. Purchase items from one of 8 Market Vendors in-game, or browse the same listings on the Market page. Listing an item or managing your own listings goes through the Market Broker instead.
- Speak to the Market Broker, in Hebian-To, for information on the market, your current listings, and payouts.
- To list: Hand the Market Broker an item, then tell her the price (in Pyreals) you'd like to list it for.
- View your listings: Tell the Market Broker "listings".
- Cancel a listing: Tell the Market Broker "cancel <listing #>".
- Claim payouts: Tell the Market Broker "claim payouts".
Allegiance
Loyalty & Leadership
Loyalty and Leadership no longer use skill credits to train — see the Character page for their formulas. Instead, both are earned automatically through play:
Loyalty
Trained by swearing allegiance to another player. Players earn Loyalty experience as they kill monsters or otherwise gain experience, and the rate increases the longer they've been sworn to the same patron — further increased while in a Fellowship with their patron doing activities together. Swearing to a new patron costs a substantial amount of Loyalty, though re-swearing to another character on your current patron's account carries no penalty.
Leadership
Trained when another player swears allegiance to you. Patrons earn Leadership experience whenever receiving pass-up XP from vassals, with the rate increasing the longer a vassal has been sworn to them — further increased while in a Fellowship with their vassal doing activities together.
Experience pass-up
- Pass-up percentages are significantly reduced from retail, but substantially increased while in a Fellowship with your vassal, doing activities together.
- Rank now plays a role in boosting pass-up amounts, along with Leadership and Loyalty.
- After being inactive for a long enough time, offline patrons no longer accumulate pass-up experience.
Rank
No more pyramid schemes. Rank is now determined by two parts: Follower Points and a Leadership skill.
Each individual player (account) counts as up to 1 follower point for the purposes of determining rank, with contributions spread across all characters on that account. An individual character's Rank Contribution is based on their level relative to the other characters on their own account.
Worked example
A player with a level 40 character and two level 20 characters on their account has 80 total character levels. The level 40 character contributes 0.5 unique followers, and each level 20 character contributes 0.25.
To calculate unique follower rank, sum the Rank Contribution of all active unique followers beneath a player in the chain, against the following thresholds:
| Allegiance Follower Points | Rank bonus |
|---|---|
| Join an allegiance | +1 |
| 1 | +2 |
| 10 | +3 |
| 25 | +4 |
| 50 | +5 |
| Leadership skill | Rank bonus |
|---|---|
| 40 | +1 |
| 80 | +2 |
| 120 | +3 |
| 160 | +4 |
| 200 | +5 |
A player therefore needs 50 unique account followers and 200 Leadership skill to reach the maximum rank of 10. Certain ranks unlock unique benefits — TBD.
Character Planner
Plan attribute and skill point spending before committing them in-game, using Daralet's actual level, XP, and skill cost tables.
Level & resources
Starting attributes
Attributes
| Primary | Amount raised | Total | XP cost | % of XP |
|---|
| Secondary | Amount raised | Total | XP cost | % of XP |
|---|
Skills
Special skills
Combat Focus
Sigil Trinkets & Jewels
Leaderboards
Top players across Daralet, ranked by in-game stats — pulled live from the server database.
About these rankings
GM/admin/dev test accounts are excluded from every category below. Most Playtime isn't shown — there's currently no tracked "time played" stat on the server to rank by.
Highest Level
Sorted by Total XP.
| Rank | Character | Level | Total XP |
|---|
PK Arena
Ranked by Elo rating. Only characters who have fought at least one rated duel in the selected bracket are listed.
| Rank | Character | Rating | W / L / D |
|---|
Capstone Dungeons
Fastest completions, sorted by completion time. Each row is one run, listing everyone in the fellowship.
| Rank | Fellowship | Time | Date |
|---|
Highest Allegiance Rank
Sorted by Allegiance Rank.
| Rank | Character | Allegiance Rank |
|---|
Most Deaths
| Rank | Character | Deaths |
|---|
Most Dangerous Creatures
Ranked by player deaths caused.
| Rank | Creature | Player Deaths Caused |
|---|
Trade Skill Leaders
Whoever currently holds the top trained value in each trade skill.
| Skill | Character | Skill Level |
|---|
Most Town Attunements
| Rank | Character | Towns Attuned |
|---|
Tinkering Calculator
Work out the odds and salvage cost of tinkering Blacksmithing, Tailoring, Woodworking, Spellcrafting, or Jewelcrafting salvage onto an item, then simulate applying it. Success chance and salvage cost depend only on workmanship, skill, and attempt number — the material you pick only decides which effect you get. Imbue gems appear under whichever discipline actually governs the target item.
1. Discipline & base item
2. Item & tool
Item Base Stats
3. Available materials
Apply a craft Simulator
Click "Apply" on a material above to simulate that attempt — success or failure, it consumes the salvage cost and counts as a tink. Effects stack until the item hits its max tink count.
World Map Prototype
Pan, zoom, and click a marker for a quick look at that place.
Marker positions are calculated from the server's real location data. Dungeons and points of interest are limited to named locations so far — more will get markers over time. Drag to pan, scroll/pinch or use the buttons to zoom, and click a town or dungeon marker for a quick preview with a link to its full page.
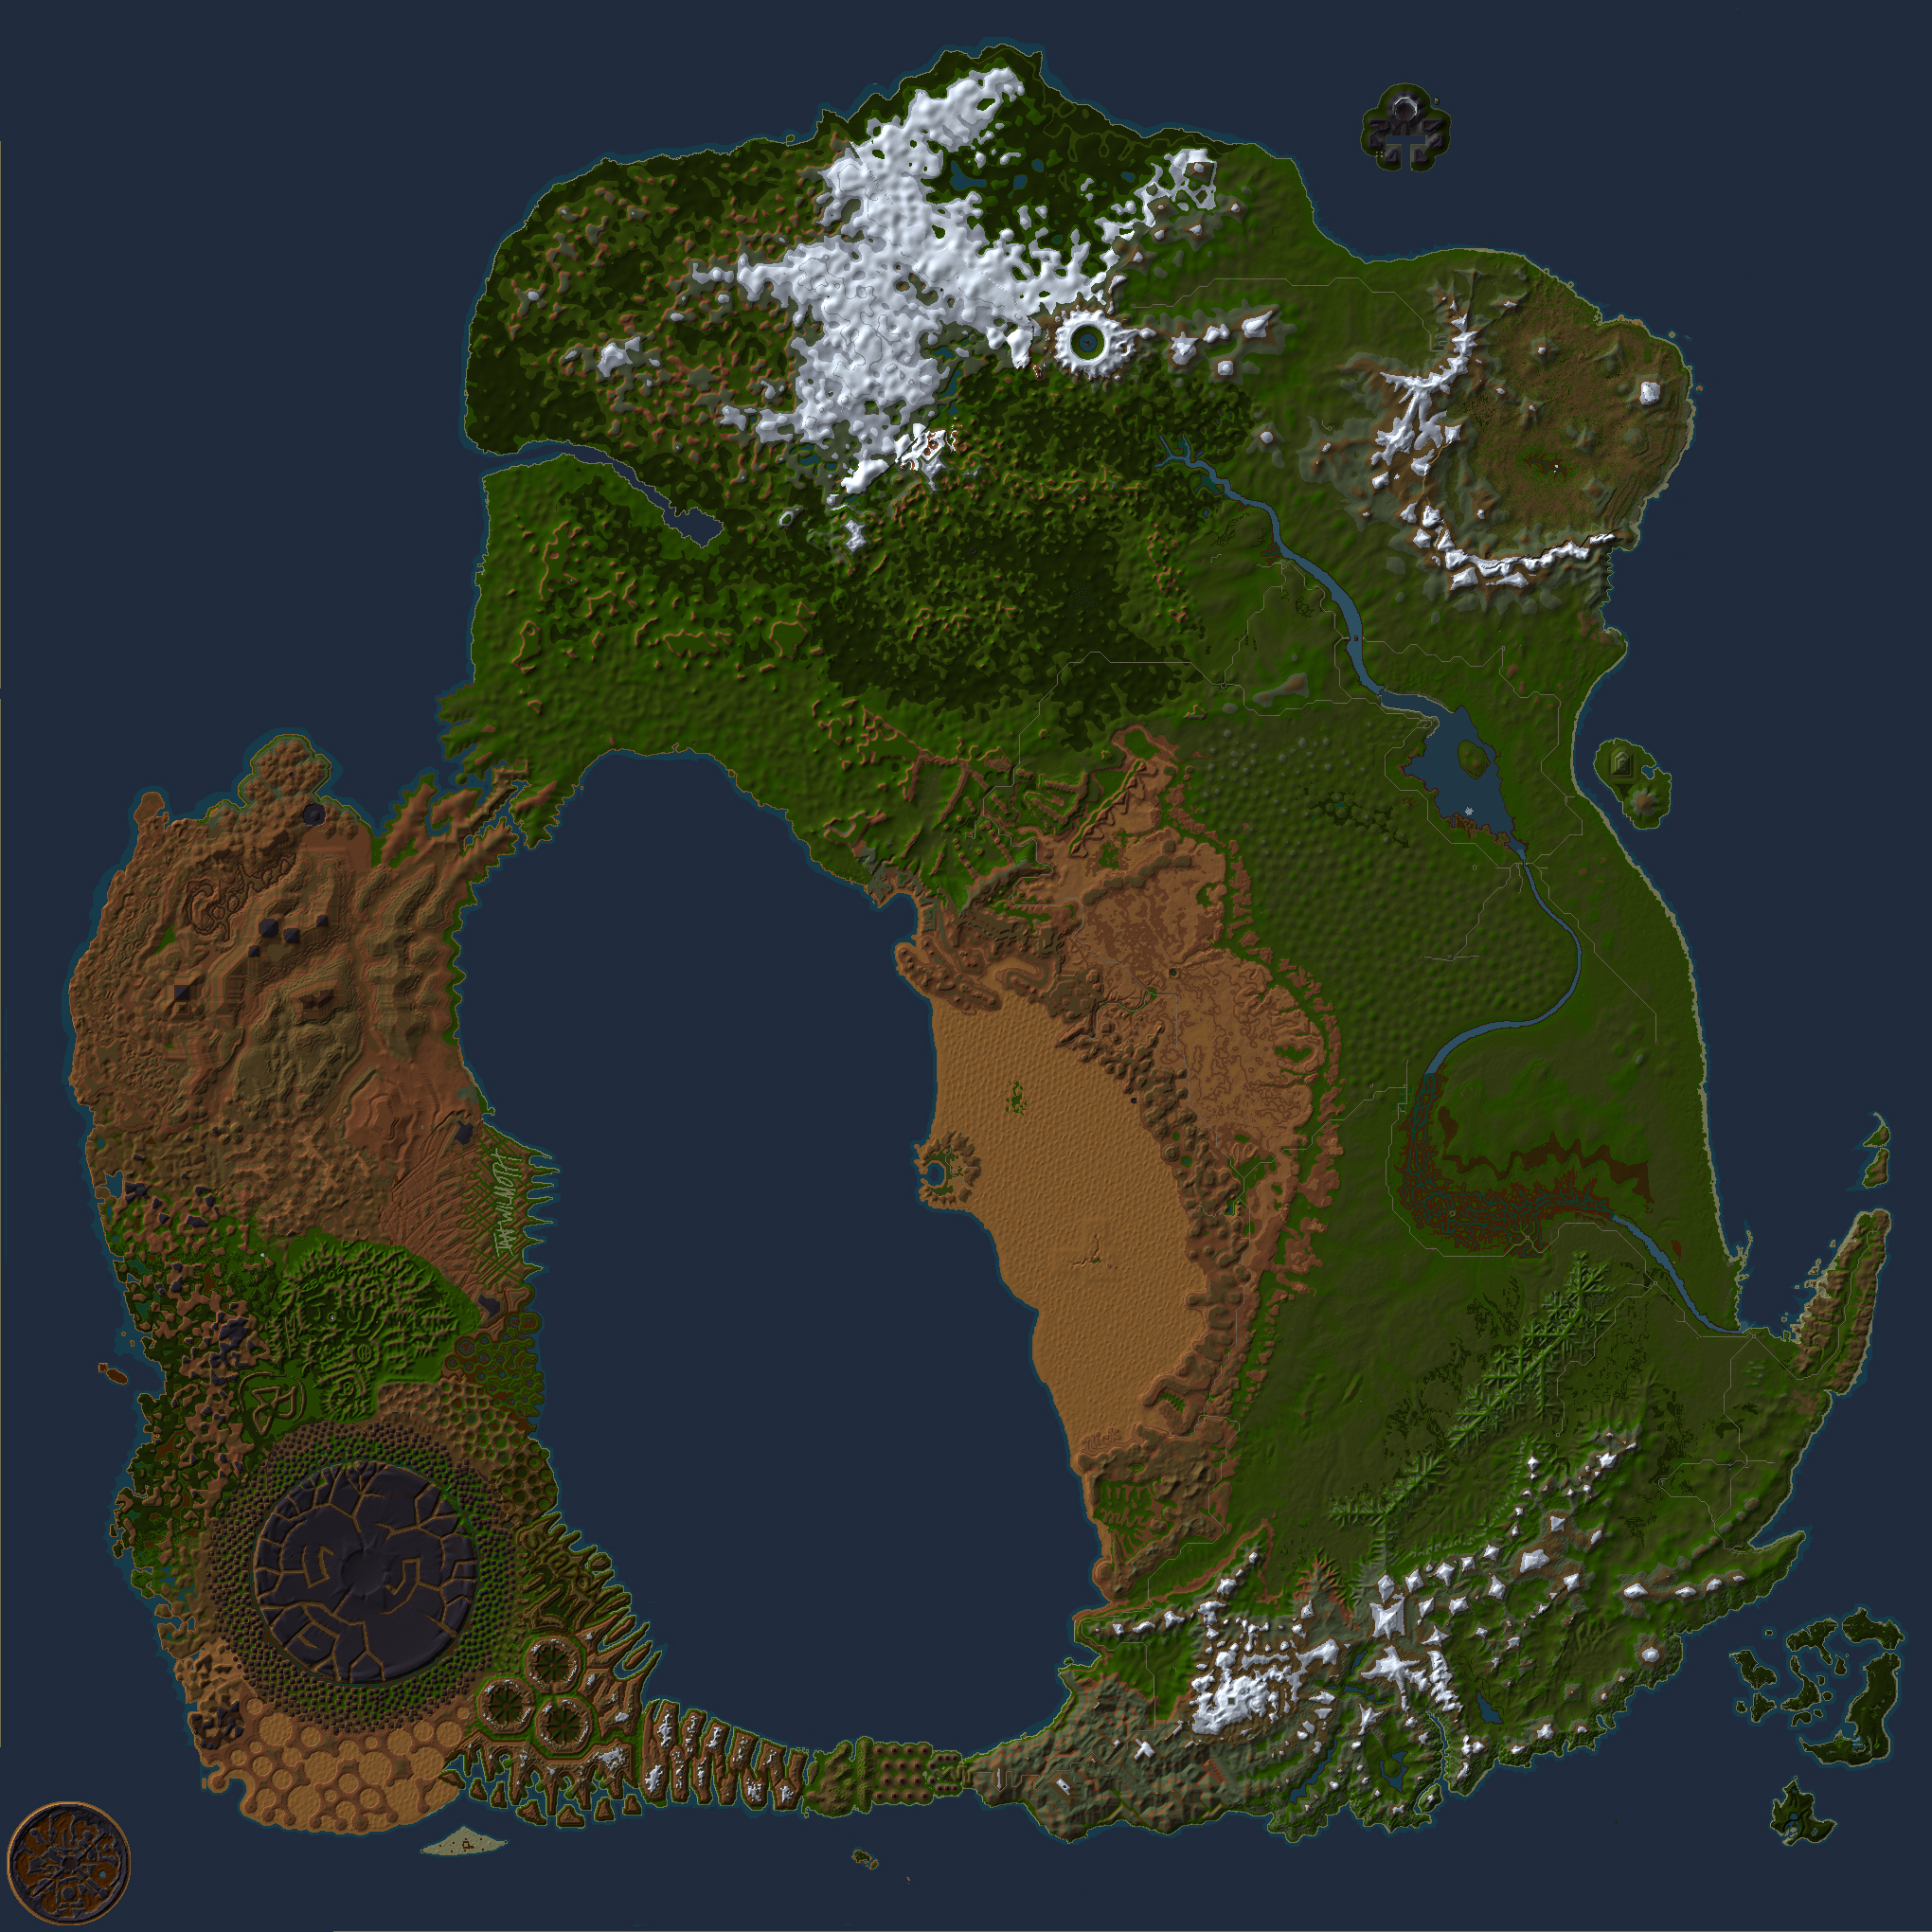
Market
Live listings from the in-game Asynchronous Trade Market.
Plugins, Files, & Commands
Recommended plugins, dat/plugin downloads, and the in-game chat commands available on Daralet.
Plugins & Decal
| Application | Version | Detail |
|---|---|---|
| Decal | 2.9.8.3 | A plugin environment for Asheron's Call. |
| Virindi Bundle | ?? | Includes everything most people need. |
| Loot Snob | ?? | Loot profile for Virindi Tank. |
| UtilityBelt | 0.2.7 | Dungeon maps, quest tracker, auto-salvage, auto-vendor, auto-trade, auto-tinker, and much more. |
| TreeStats | 1.2.3b | Uploads character and allegiance info to the TreeStats website. |
| Mag-Tools | 2.2.0 | Removes window borders, frame-limits out-of-focus windows, a suit builder, and other meta utilities. |
| Radar Add-on | 1.2.0.71 | Required for MiniMap and some AC+ features. |
| MiniMap | 1.1.0.282 | Adds dungeon walls to the radar — unvisited areas show white, visited areas show blue. |
| AC+ | 2.0.0.2208 | Chat filters and much more. |
| Chaos Helper | 2.2.6 | Customizable push-button commands and chat shortcuts, in place of hotkeys. |
| Defective | 1.0.1.4 | A replacement item bar — drag any item or spell onto any hotkey spot, unlike the default AC item bar. |
Plugin Files
Daralet-specific files for plugins
DATs
The latest dat files
Portal
Download Link
Cell
Download Link
Lang
Download Link
Commands
Chat commands available on Daralet
/sort
Organizes player inventory (main and side packs), sending qualifying items into specialty packs if able.
/invite <name>
Invites a player to your fellowship, even if they are not nearby.
/allegiance-rank
Displays how your current allegiance rank is calculated.
/corpses
Displays all recent corpse locations of the player.
World
Dereth spans a huge, seamless continent and its surrounding islands. New arrivals start in one of a handful of home towns before spreading out across the map.
Notable regions
Osteth
The mainland region where Isparians first arrive in Dereth — the continent's main population center, split into Northern, Middle, and Southern Osteth.
Content levels 1–50.
Esper Mountains
A snow-covered mountain range in Northern Osteth, centered on Mount Esper, with peaks stretching east and northeast across the region.
Content levels 50+.
Olthoi North
An Olthoi-infested stretch of northeastern Osteth, ringed by the Lost Wish Mountain Range.
Content levels 50+.
Inaccessible regions
Direlands
A harsh, mountainous expanse south of Osteth, riddled with swamps and jagged peaks and offering little safe ground — recommended only for experienced adventurers.
Aerlinthe
A volcanic island built up as a high-level hunting ground, centered on the volcano Tenkarrdun and a dredged, man-made harbor.
Veseyan Islands
A chain of tropical islands southeast of Dereth, named for a slave who died defending the portal there so his fellow escapees could flee the Olthoi.
Marae Lassel
A separate landmass made up of five regions — Ahurenga Plains, Karab Delta, Manumet Plains, Marescent Plateau, and Tuatara Plains — each with its own town.
Towns
Dereth is home to many towns, both independent and aligned with one of the three heritages. They serve as crucial quest hubs for player progression.
Restored classic towns
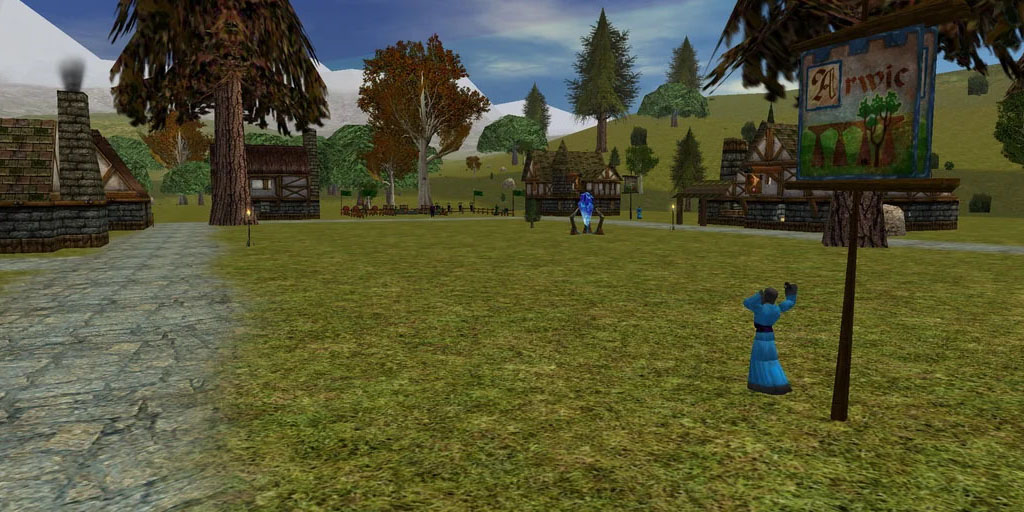
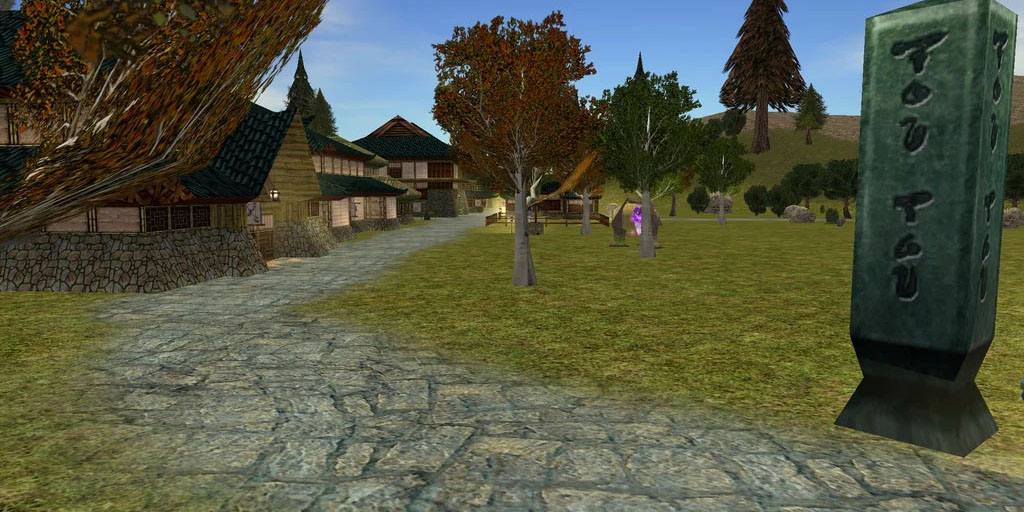
Classic Restorations include Arwic, Tou-Tou, Yanshi, Glenden Wood, Dryreach, and more — see the full directory below for the complete list by heritage or level tier.
View all towns
Aluvian
- Holtburg Starting Town
- Cragstone Capital
- Arwic
- Glenden Wood
- Eastham
- Lytelthorpe
- Rithwic
- Dryreach
- Plateau Village
- Stonehold
Gharu'ndim
Independent / Other
Tier 1
Tier 5
Portal network
A reimagined portal system that promotes exploration and, eventually, convenience. Special portal hubs are available in the capital towns; however, a portal to a town cannot be used unless the player has already visited the town in person and "attuned" themselves to it via a Town Attunement Device. This does not apply to the starter towns.
- Town Network and all Settlement portals have been removed.
- Each town contains a portal to its heritage's capital town.
- Each capital town contains portals to all towns of the same heritage, as well as the other capitals.
- Starter towns contain portals to each other, in addition to their capital.
Quests
Most quests have been rebalanced to be in line with the progression of the new world design.
Temporarily removed
Some quests have been temporarily removed.
Dungeons
Most simple dungeons have been rebalanced and may contain quest-timed chests. Many dungeons have been reimagined into moderately difficult small-group experiences for 3+ players (Capstones), which scale in difficulty when more than 3 players are present.
Players can activate a Shard of Shrouding to gain access to certain lower-level dungeons, though their offensive and defensive stats will be scaled down to the enemy's level. Some fellowship dungeons can support up to 10 simultaneous instances, if multiple groups are utilizing that content at the same time.
Group Dungeons
Tier 1
Tier 2
Tier 3
Tier 4
Tier 5
Raids
Monsters
All monsters have been completely rebalanced and tweaked, with many new types added.
Animal parts
Non-humanoid enemies no longer drop equipment loot — instead, they drop special "animal parts" that can be used in crafting recipes or exchanged at certain NPCs for a variety of items.
- Meat: can be used as currency at Cooks.
- Hide: can be used as currency at Leather Crafters.
- Bones: can be used as currency at Ivory Crafters.
- Trophies: can be traded to a Trophy Collector for pyreals or a Trophy Smith for items, and are also used in Alchemy and Cooking recipes.
Spawns
Nearly every landblock has been touched by hand, with changes to which monsters spawn where, focused on progression and geographical theme.
Encounter types
Many new "encounter types" can be found throughout the world, such as advanced enemy camps, NPCs in need of help, and more.
Hunting system
A new hunting system allows players to pursue a special enemy by defeating enemies of similar types.
Town
Summary
NPCs
Quests
Points of interest
Dungeon
Summary
Images
Enemies
Rewards
Quests
Community guides

Item
Description
Stats
Lore & Timeline
Dereth's story stretches back tens of thousands of years, long before any Isparian character sets foot on it. Here's the shape of it, in brief.
Foundation of Empire (or, the First Sending of Darkness)
More detail
For twenty thousand years, the Empyreans ruled the planet of Auberean. Though they did not originate here, they came to call it home. They were split across several kingdoms and heritage groups: Falatacot, Haebrean, Dericost, and Yalaini.
In this Golden Age, the Falatacot learned to weave magic and made their home on the island of Dereth. With the arrival of an ice age, they fled to the Kingdom of Dericost where they bargained their knowledge of blood, death, and entropy magic for sanctuary from the cold.
The Dericost did not share the ethical concerns that kept the Falatacot from performing their darker rituals; soon the Dericost nobility would use Falatacot magic to bind their spirits to their decaying bodies. In this time, Lady Aerfalle and Lord Rytheran were but two amongst many. These undead lords grew immensely powerful and greedy, and stole away to a hidden city beneath the Gelid Plateau, Vasmora, to become the secret rulers of the Kingdom of Dericost. Unknown to their living subjects and puppet-king above, His Eternal Splendor, Geraine IV ruled the kingdoms of both the living and the dead from Vasmora for millenia.
But in their long lives, the undead of Vasmora grew arrogant. A schism formed between those who wished to rule openly (the Lords), and those who desired to stay hidden (the Winds). The living King of Dericost, Sarvien II revealed to his subjects the ruling caste of undead and soon became undead himself. In opposition to Geraine IV, Sarvien II declared himself king of both the living and the dead and allied with the Lords against Geraine IV and the Winds. Still not wishing to reveal themselves, Geraine IV and his Winds abandoned the Kingdom of Dericost and fled to new hidden fortresses across Auberean.
Soon, the Millenium War began. Burgeoning with the very same greed that drove his Lordly allies, King Sarvien II consolidated his power and began a war of expansion against his neighboring kingdoms: the Haebrous to the east, and the Yalaini to the southwest.
For nearly a thousand years the Haebrous and Dericost Kingdoms were devastated by war. As their victory became pyrrhic, the Lords lost faith and blamed the Falatacot for their failures and set out to exterminate them. One survivor, a nameless Falatacot woman, led the Haebros King, Jailne, and the Yalaini Empress, Alaidain to Vasmora beneath the Gelid Plateau and battled Sarvien and his Lich advisors. As he died, Sarvien uttered the Fivefold Curve, a prophecy from the Book of Eibhil:
As we were sent by the Darkness
The Darkness shall send again
An avenging star
A light to bring darkness
The Darkness shall send then
A knowledge:
A power to bring destruction
For Alaidain's blood shall be
The death of the people
And then Darkness shall send yet again
And once more, and the Darkness shall win.
With Empress Alaidain as the only survivor, she assumed rule over the shattered remnants of the Dericost and Haebrous Kingdoms, bringing the seaborne Empire of Yalaini to span the globe. The surviving undead Lords flee and find their way to Dereth.
In this second golden age, the Age of Contentment, the new Empire of the Yalaini rebuild the broken lands, and flourish. But as Sarvien uttered: the Darkness shall send again, and the Darkness shall win.
The Shadow Rising (or, the Second Sending of Darkness)
More detail
Thousands of years pass and the Black Rains arrive. Crops fail as ash and soot fall from the sky and the Yalaini soon believe the Light has abandoned them. Rationing begins, but the Elders hoard their foodstuffs in the smaller villages and towns. It is in one of these small villages that a descendent of the Dericost, a mage named Ilservian Palacost demands from the Elders food to feed his family. They refuse, and his son starves to death. Driven to despair and forsaking the Light, Ilservian calls to the Darkness for aid. And the Darkness answers. Ilservian and his followers step into Shadow.
A century after the Black Rains had begun, they finally subside. Emperor Caerlin I declares it a new age, an Age of Lore. The Empyreans grow restless with curiosity, and seek greater understanding of the world around them such that they may prevent any future catastrophes. On Dereth, they establish a research facility.
A few more centuries later, Asheron Realaidain is born to Atlan, Lord of Knorr, and Lady Maila, Master of the Knorr Lyceum.
From here begin their long struggle with Darkness. First the Shadow appears as only a rumor, then the town of Daralet is lost. Children go missing, and a Shadow grows to cover the Dericost continent. The Yalaini Empire sends Lord Atlan and his army, and it disappears. Only a single squire returns, raving madly about shadowy men, women, and children enveloping them, all led by a great winged creature. Eventually, the black winged creature is given a name: Bael'Zharon, Slayer of Hope.
With this new threat assaulting the Empire, the Emperor calls upon the greatest mages of the time to convene a council. This Council of Five is made up of:
- Viceroy Uweden Kormar, the aged scholar and mage who had governed Gelid for the Empire before it fell to the Shadows.
- Lady Rajael Fellarien, who is freed from her confinement in the southern wastes.
- Lord Kerenth Portenaer, who is promoted from the ranks of the Emperor's personal guard, the Order of Hieromancers.
- Lady Adja, a prophetess and priestess of the Ithnaec Cathedral.
- Lady Maila Realaidain, Master of the Knorr Lyceum and widow of Lord Atlan. (Lady Maila's son Asheron also accompanies her and serves as an assistant to the Council.)
The Shadow advances across Haebrous lands until it is met by the Council of Five in the town of Dernhale. There they battle and defeat the Shadow Mage, Elithra of Daralet. Once killed, the Shadow forces are sent into panic and disarray.
The Council returned to their capital and searched the archives for the name Elithra of Daralet. They soon learn she was a follower of Ilservian Palacost, which leads them to the true identity of Bael'Zharon. And they realize they were responsible for his fall to the Shadow. He has become a conduit for the Darkness.
Despite this knowledge, the war with the Shadow rages on. As they retreat further and further back, eventually to Ireth Lassel – Dereth – the Emperor Caerlin is poisoned as he slays Shadow General Omadin, eventually driving him mad. The Imperial capital of Tentael falls. And the Crystal Array, proposed as the prison to hold Bael'Zharon, is completed at the Jailne Lyceum. Feeling its power, Bael'Zharon directs his attention to the Lyceum that holds it.
He breaks through and touches it. The Council of Five speak the final incantation, and Bael'Zharon is flung into the portalspace prison they had devised. But the energies overwhelm the Array, and it shatters. The explosion kills Shadow and Empyrean alike, and leaves the Obsidian Plains in its aftermath. All present but Asheron, protected by Lady Adja's and his mother's magic, die.
The Second Age of Lore begins. Again, the Empire of the Yalaini enter an era of rebuilding and magical research. Five of the Six shards of the Crystal Array are found and secreted away to guarded vaults, but no trace of the sixth piece can be found. The shards themselves are endowed with some consciousness and seek to bury themselves deeper and deeper in the earth. The last member of the Council of Five, Asheron, returns to his home on Knorr and takes up his mother's mantle as Master at the Lyceum. Caerlin I dies after his long madness from Omadin's poison, and is succeeded by his son, Caerlin II.
It is during this Second Age of Lore that the Lugians and Isparians, each on their own planets far from Auberean, establish themselves. Lugian women learn to work metal. The prophet Jojii speaks of his visions and the paths shown to him by the Unicorn of Grace. Back on Dereth, the brothers Gaerlan and Delacim enroll in the Knorr Lyceum.
The Time of Portals(or, the Third Sending of Darkness)
More detail
The Third Age of Lore begins with Asheron's creation of the first stable portal. Within a century, he and his students have created thousands linking the far-flung corners of Auberean in ways never before dreamt. Soon, Asheron looks beyond Auberean seeking to create portals between worlds.
With the discovery of a Lich, the remaining Dericost (calling themselves Gelidites), flee the Haebrous lands and find their way to Dereth under guidance of their Council of Three. There, they seek a site for their great work: to build a city they will call Frore which prophecy dictates will play an integral part of the Fourth Sending of Darkness. Once they land, they murder the crews of the ships that bore them in profane rituals. The last Gelidites transform into undead. As they delve deep into the earth to build their city of Frore, they find the sixth shard of the Crystal Array. Their mages exploit a connection this shard bears to a power deep within the earth to draw heat from the world to usher in an ice age and the prophesied Fourth Sending of Darkness.
Gaerlan, seeking to break away from his brother's shadow, discovers a Gelidite Library on Aerlinthe Island. There, he hopes to master their elemental magics in secret.
Asheron's long life begins to be noticed; the ancient falatacot spell Lady Adja and his mother cast upon him has slowed his aging. While still the leader of the Lyceum, he hides behind a pseudonym. Gaerlan discovers this, and, again seeking his own glory, reveals it to the current Emperor, Kellin. Kellin charges Gaerlan to watch over Asheron as a representative of the royal court. And Asheron is charged to explore more and more dangerous worlds that his portals have led him to.
The Time of Olthoi (or, the Third Sending of Darkness)
More detail
It is during this time, as Gaerlan masters elemental magic and Asheron hides behind a pseudonym, that Delacim and Asheron are able to open portals to the Lugian homeworld, Tuu, the Tumerok world of Ezheret, and Ispar. Now charged to explore more dangerous worlds, Asheron discovers the homeworld of the Olthoi and Delacim is killed in the initial expedition there. Intrigued, the Emperor demands over Asheron's warnings that they be captured and studied.
Only a few years later, Olthoi are able to escape and begin to overrun the facility. Using the portals from a specimen-recovery mission, they are able to travel back to Auberean and further use the portal network from there. Once he realizes this, Asheron collapses the network, but it is too late. Olthoi have poured through the gateways and have spread across Auberean. Those that escaped wage a guerilla war against their Empyrean captors. Drawn to their magicians and due to their innate resistance to magic, the Olthoi are able to hunt the mages with extraordinary talent. While they seek out and kill the Queens, the Olthoi are breeding much too quickly.
For the second time, the Imperial capital Tentael falls and the Empyreans flee to Dereth. There they shroud the island in magical fog and seek a means to defeat the Olthoi before they are found. Olthoi flyers, drawn to the concentration of magical energies on Dereth, soon arrive and bring with them a larval queen, who grows to be the One Queen of Auberean.
Seeking answers, the Empyreans turn to Asheron. In a desperate move, he sends the survivors "elsewhere", and stays behind to stabilize portalspace after his sundering. He declares the Age of Shifting and becomes the last living Empyrean on Auberean.
What follows is the fallout of his Sundering spell: portals appear on the worlds the Empyreans had visited in these past centuries of exploration. The Virindi arrive leading their own expedition, and the conflict between them and Asheron is swift but violent: the Virindi lose abruptly and completely, and abandon the planet. Their battle accelerates the Sundering and more, and more portals appear. Olthoi kill most of those that arrive on Dereth, and enslave the rest. Tumeroks, Lugians, Banderlings, Mosswarts, and Drudges all begin to arrive. Isparians follow closely. The Virindi return to the Obsidian Plains and establish themselves across the Direlands.
On Marae Lassel, Hea and Aun clans of Tumeroks arrive believing they are needed to defend the legendary world spoken of by their ancestors. They wage war on the Olthoi Queen after she attempted to enslave them, and eventually discover that their drumming is echoed by the island's Menhir Rings which is able to drive the Olthoi underground. Their bravest warrior delve into the tunnels carved by the Olthoi, and eventually are able to infiltrate the ROyal Hive and slay the Queen in its depths. Their continued drumming keeps the larval Queens from maturing.
Elysa Strathelar arrives on Dereth, and after escaping is discovered by Thorsten Cragstone and his men. They flee to the Isle of Tears and make their home in the Underground City.
The Virindi arrive on Marae Lassel, promising the Tumeroks power beyond their imagination if they would agree to be subject to their experiments. Most are horrified, but an outcast adolescent Hea Aranpuh agrees and is transformed into a more humanoid form. Aranpuh returns to Timaru and defeats the Hea chief. More leave to join Aranpuh, and a schism develops between the Aun and Hea tribes. Defectors from either tribe join the other; the Hea leave with the Virindi.
Elysa comes to the notice of Asheron, who is bewildered that other intelligent beings have arrived on Dereth. After being told of the Olthoi menacing her people, Asheron tells her of their weaknesses, and provides her an alchemical potion: the Olthoi Oil by which they may slay the Queen.
Using the scent glands of a Brood Noble, Thorsten, Elysa, and their small band infiltrate the Royal Hive of the One Queen and slay her with Elysa's oiled arrow through the eye. Thorsten however, is killed moments before the One Queen's death. Driven mad by the confusion following their Queen's death, countless other Olthoi are slain and New Aluvia was declared.
Asheron enchants the binding stones once used by his people's old portal network to create the Lifestones to prevent the unnatural death of anyone else on Dereth. From his long years of research since the Sundering, he is also able to alter the portals that appear on other worlds such as Ispar, modifying them to only appear to those powerful or curious enough to take them. The Call begins.
The Time of New Aluvia
More detail
Lilitha is captured by Hea Tumeroks and handed over to the Virindi who begin experimenting on their first Isparian captive. Elysa accepts Asheron's offer and lives with him for a time in his castle off the coast from Eastham.
Celcynd, the first Isparian mage to master portal magic, is able to evacuate the children from Holtburg as the town is overrun by Tumeroks. However, he is unable to conjure a second portal and most of the adults are slain in the town. As they had never yet touched a lifestone, there was no returning for them. Tormented and blaming himself for creating a generation of orphans, Celcynd loses himself in alcohol.
Daralet's Timeline — The Portal Years (PY)
More detail
The first ten portal years (PY) proceed as they did in the original game. The timeline for Daralet diverges over the course of The Fourth Sending of Darkness, which took place from Frostfell 10 PY to Frostfell 11 PY.
Shadow General Isin Dule did not openly assist the Isparians in their war, and was successful is preventing the use of the Shadow Spires; his wish was to save the Thorns of the Hopeslayer for a greater foe. Utilizing the Portal Network, he led the Shadow's armies against the Isparian settlements along with his fellow Generals, Ler Rhan and Black Ferah.
In response, Asheron collapsed the portal network to attempt to save the Isparians. While some agreed that this was necessary for them to win the war, others claimed it cost more lives than it saved, and that the Shadows were a lesser threat they would have overcome.
In their final battle beneath Ithaenc Cathedral, Asheron, an Adventurer, and Elysa battled Bael'Zharon and his Shadow Generals. As the fight raged and oceans of mana were pooled and spent, Elysa struck at Bael'Zharon to draw his attention so Asheron could strike. As Asheron wove the Light to banish Bael'Zharon back to his prison, he struck back at Elysa with the greatest of Jhirvall's Gifts. Elysa was destroyed utterly. Asheron's spell changed, and the prison of Light he wove became a spear that illuminated the deepest shadows of Bael'Zharon's being, consuming the Child of Daralet in terrible radiance.
With Bael'Zharon's death, the Shadows fled in disarray. Though victorious, Asheron and the Isparians hardly recognized it as such. They returned to Cragstone bearing the corpse of their High Queen.
In the year that followed, the peoples of Dereth rebuilt. A Regency Council was established to rule New Aluvia during the minority of the boy-king, Borelean Strathelar. Asheron, aided by the master mages, established a new portal network that sought to unify the Isparians as Elysa had done.
It was quiet now as it was then…
Ongoing story arcs
Dereth's history keeps moving through recurring conflicts between human settlers, the Olthoi, and older, stranger powers still active on the continent.
More detail
Placeholder — expand with your server's current arc: active factions, recent developments, and where the story stands today on Daralet specifically.
Items & Storage
Gear in Dereth ranges from common starting equipment to hand-crafted and boss-dropped pieces built through tinkering and salvaging.
Currency
| Currency | Use |
|---|---|
 Pyreals Pyreals | Standard currency for trading and vendors. |
 Meat Meat | Dropped by animal creatures. Can be used as currency at Cooks. |
 Hide Hide | Dropped by animal creatures. Can be used as currency at Leather Crafters. |
 Bones Bones | Dropped by animal creatures. Can be used as currency at Ivory Crafters. |
 Sigil Dust Sigil Dust | Obtained by trading in unwanted Sigil Trinkets to Shirushi Ren, in Hebian-to. Can be used as currency at Shirushi's Assistant. |
 Small Venom Sac Small Venom Sac | Dropped by olthoi in Olthoi North. Can be used as currency at a vendor in Arwic. |
 Gelidite Relics Gelidite Relics | Dropped by creatures in the Esper Mountains. Can be used as currency at a vendor in Mountain Retreat. |
| Trophies | Dropped by various creatures. Can be traded to a Trophy Collector for pyreals or a Trophy Smith for items. Also used in Alchemy and Cooking recipes. |
Banking
An in-game UI that grants access to account-wide storage, located in each of the capital towns.
Inventory management
New special packs contain a large amount of space and reduce burden of their contents by 25-75%, depending on the quality of the bag:
Quiver
For arrows and fletching supplies. Holds up to 30 items.

 25%
25% 50%
50% 75%
75%Spell Comp Pouch
For spell components. Holds up to 102 items.
 25%
25% 50%
50% 75%
75%Salvage Crate
For bags of salvage. Holds up to 102 items.
 25%50%
 75%
75%Trophy Bag
For monster trophies. Holds up to 60 items.
 50%
50%Weapons
Loot has been heavily rebalanced across 7 tiers.
Every weapon type carries an implicit subtype bonus:
- Biting Strike: Axe, Dagger, Bow, Throwing Axe/Dagger, Scepter.
- Crushing Blow: Mace, Staff, Atlatl, Throwing Club/Shuriken, Wand/Baton.
- Armor Cleaving: Spear, Crossbow, Throwing Dart/Javelin, Orb (Ward Cleaving).
- Stamina Cost Reduction: Sword, Unarmed.
- Improved Defense Mods:: Casting Staff
Melee
Missile
Missile damage is Ammo Dam (a flat value carried by the arrow/bolt/dart, shared across a whole launcher class) multiplied by the launcher's own Damage Mod range. Thrown weapons are covered under Melee above — mechanically they're mutated the same way as melee weapons.
Caster
Elemental casters can be found at all loot tiers. Casters can roll with either a War or Life trained requirement:
- War: full elemental damage bonus, plus a restoration bonus equal to a quarter of the damage bonus.
- Life: the elemental damage bonus is halved, and the restoration bonus matches that same halved amount.
Tier 0 casters don't roll the elemental damage bonus above — instead they roll a separate damage penalty ranging -50% to +0%.
Armor
Each armor type has been assigned a weight class of Heavy, Light, or Cloth.
Note on Ward: a new stat that works the same way armor does, but against magical damage. All ward amounts on a player's armor combine into an overall Ward Level, which also reduces the duration and effectiveness of debuffs on the player.
Heavy
Wield req: base Strength
Skill mods: Attack skill, Physical Defense, Magic Defense, Two-Handed Combat, Shield, Perception, Deception, Health Regeneration
Shields
Light
Wield req: base Coordination
Skill mods: Attack skill, Dual Wield, Shield, Run, Thievery, Perception, Deception, Stamina Regeneration
Shields
Cloth
Wield req: base Self
Skill mods: War Magic, Life Magic, Magic Defense, Mana Conversion, Perception, Deception, Mana Regeneration
Sigil Trinkets
Sigil Trinkets are lootgen items with build-defining effects. They're equipped in the sigil slots (aetheria) and must match the color of the slot. Each slot unlocks at certain levels (10, 50, and a further TBD level). Sigil Trinkets have limited uses and must be recharged occasionally at active Menhir Rings around the world. Each Menhir Ring has a strength level (blue, yellow, red) and can only recharge trinkets of matching strength or lower — certain Menhir Rings can also imbue an equipped sigil trinket with a bonus stat.
| Stat | Default roll range |
|---|---|
| Cooldown | 10–20 sec |
| Proc chance | 25–75% |
| Vital reservation — Health | 5–10% (halved for hybrid trinkets) |
| Vital reservation — Stamina/Mana | 10–20% (halved for hybrid trinkets) |
Workmanship
Workmanship is now determined by the stat rolls of an item — if an item has higher workmanship than another, it likely has better stat rolls as well. High workmanship items are extremely rare.
Imbues
Imbue scaling has been adjusted. Half of the bonus effect is applied by default (at 1 skill); the other half is received depending on weapon skill level, from 1 to 500 skill.
| Imbue | Max potential |
|---|---|
| Critical Strike | +20% (down from +50%). Base +10% bonus; scaling improves with weapon skill at a slower rate. |
| Crippling Blow | x2 crit damage (down from x6). Base crit +100% bonus; scaling improves with weapon skill at a slower rate. |
| Elemental Rend | +30% (down from +150%). Scaling improves with weapon skill at a slower rate. |
| Armor Rend | Ignore 20% enemy armor (down from 60%). Scaling improves with weapon skill at a slower rate. |
| Ward Rend New | Ignore 20% enemy aegis. Scaling matches Armor Rend. |
Monster loot profiles
Different types of enemies drop different types of loot:
- Magical enemies drop more cloth armor, wands, and scrolls.
- Tough enemies drop more heavy armor, martial weapons, and thrown weapons.
- Agile enemies drop more light armor, daggers, staves, UAs, and bows.
- Animal enemies only drop meat, bones, and hide (high quality at higher tiers) — see the World page for the "animal parts" crafting/exchange system.